UV Adhesives: Encapsulating Smart Anti-Glare Rearview Mirrors 

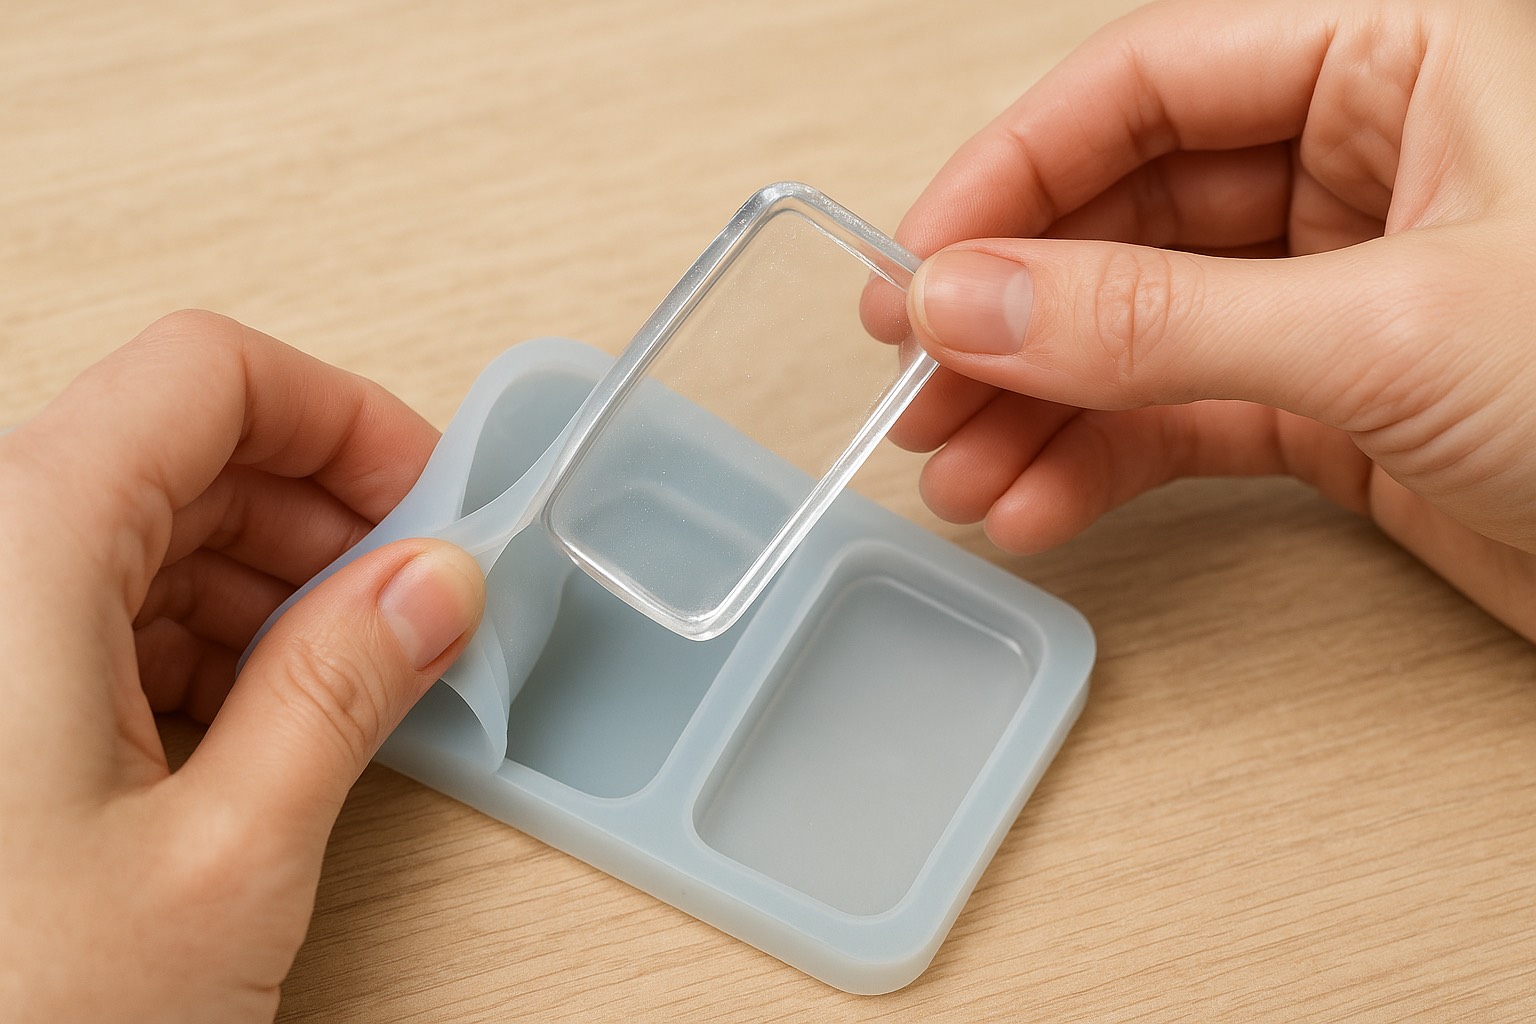
In the rapidly advancing automotive landscape, smart anti-glare rearview mirrors are no longer a futuristic concept but a vital component for enhanced driver safety and comfort. These sophisticated mirrors utilize electrochromic technology to automatically adjust their tint, eliminating dangerous glare from headlights and bright sunlight. However, the performance and longevity of these cutting-edge devices depend heavily on the integrity of their internal components and the precision of their assembly. For manufacturers and industry professionals pushing the boundaries of automotive innovation, UV adhesives have emerged as a game-changer for the encapsulation of smart anti-glare rearview mirrors. This blog explores the critical benefits of UV adhesive encapsulation and highlights how Incure's specialized solutions are empowering the next generation of automotive vision systems. The Demanding World of Smart Rearview Mirrors Smart anti-glare rearview mirrors are complex assemblies that integrate multiple layers and sensitive electronics, including: Electrochromic Layers: These are the core of the anti-glare functionality, changing their opacity in response to an electrical charge. These layers are often liquid or gel-based and highly susceptible to environmental degradation if not properly sealed. Transparent Conductive Coatings: Critical for applying the electrical charge across the electrochromic layers. Sensors: Light sensors detect ambient light and glare levels to trigger the dimming function. Circuitry and Connections: Delicate electronic components that control the dimming process and communicate with the vehicle's system. These mirrors are exposed to a challenging automotive environment: Temperature Extremes: From freezing winters to scorching summers, significant thermal cycling can cause expansion and contraction, leading to material stress. Humidity and Moisture: Ingress of moisture can short-circuit electronics and degrade electrochromic materials. Vibration and Shock: Constant road vibrations and potential impacts can disrupt delicate connections. UV Radiation: Direct sunlight exposure can degrade materials over time if not adequately protected. Traditional encapsulation methods can be slow, less precise, and may not offer the necessary long-term protection or optical clarity. The UV Adhesive Advantage: Precision, Speed, and Protection UV-curable adhesives provide an unparalleled solution for encapsulating smart anti-glare rearview mirrors, offering a combination of speed, precision, and durability that conventional methods often cannot match: Instant Curing for High-Volume Production: One of the most significant advantages of UV adhesives is their rapid cure time, often in mere seconds, upon exposure to UV light. This "cure on demand" capability drastically accelerates manufacturing throughput, making high-volume production lines highly efficient. Precise Application and Alignment: UV adhesives remain liquid until exposed to UV light, allowing for precise dispensing and easy alignment of delicate components (like the electrochromic layers and conductive coatings) before final curing. This ensures optimal optical performance and function. Superior Environmental Sealing: Once cured, UV adhesives form a robust, hermetic seal that effectively encapsulates and protects sensitive internal components from moisture, dust, and chemicals. This prevents degradation of the electrochromic medium and corrosion of electronics. Excellent Optical Clarity: For smart mirrors, optical performance is non-negotiable. Many UV adhesives are formulated to be optically clear, minimizing light scattering or yellowing over time, ensuring the mirror maintains its pristine visual quality and dimming effectiveness. Stress Relief and Vibration Damping: Certain UV-curable formulations offer flexibility after curing, which helps absorb mechanical shocks and…

Comments Off on UV Adhesives: Encapsulating Smart Anti-Glare Rearview Mirrors 

Epoxy Potting: Unlocking Durability for Wireless TPMS Applications

In the relentless pursuit of automotive safety and efficiency, Wireless Tire Pressure Monitoring Systems (TPMS) have become indispensable. These tiny, yet critical, sensors embedded within the tire constantly monitor pressure and temperature, transmitting vital data to the vehicle's onboard computer. However, the environment inside a tire is anything but forgiving – extreme temperatures, high centrifugal forces, constant vibrations, and potential exposure to moisture and chemicals demand unparalleled protection for these sophisticated electronic components. For manufacturers and industry professionals involved in TPMS development and production, the choice of encapsulating material is paramount. This is where epoxy potting emerges as the hero, providing the robust shield necessary for long-term reliability. This blog delves into why epoxy is the material of choice for TPMS applications and how Incure delivers cutting-edge solutions to meet these rigorous demands. The Hostile Environment of the Tire Cavity: Why Standard Protection Won't Cut It Consider the daily life of a TPMS sensor: Extreme Temperatures: From scorching summer pavements to freezing winter roads, temperatures inside a tire can fluctuate wildly, leading to thermal expansion and contraction stress on components. Vicious Vibrations & Shocks: Every bump, pothole, and rotation subjects the sensor to relentless vibrations and sudden impacts, threatening delicate solder joints and circuitry. High Centrifugal Forces: At highway speeds, the forces exerted on the sensor can be thousands of times the force of gravity (up to 3000g), demanding materials that can maintain structural integrity. Moisture & Contaminants: Despite being sealed, there's always a risk of moisture ingress, which can lead to corrosion and electrical failure. Chemical Exposure: Even inside the tire, exposure to tire sealants, lubricants, or even air contaminants can degrade unprotected electronics. Without a robust protective layer, the lifespan and accuracy of TPMS units would be severely compromised, leading to frequent failures and safety concerns. Epoxy: The Indispensable Guardian for TPMS Epoxy potting compounds are specifically engineered to provide superior protection for electronic components in harsh environments. For wireless TPMS applications, their unique properties offer distinct advantages: Exceptional Mechanical Strength and Impact Resistance: Epoxy cures into a hard, rigid material that can withstand the intense centrifugal forces, shocks, and vibrations experienced within a tire. This mechanical robustness protects the sensitive PCB, integrated circuits, and battery from physical damage. Superior Environmental Sealing: Epoxy creates an impermeable barrier, effectively sealing the electronic components from moisture, dirt, dust, and aggressive chemicals. This prevents corrosion and ensures the integrity of electrical connections over the sensor's lifespan. Excellent Dielectric Properties: As an electrical insulator, epoxy prevents short circuits and maintains signal integrity, crucial for the reliable wireless transmission of pressure and temperature data. Thermal Stability and Management: While direct heat dissipation can be a challenge for some epoxies, specialized formulations are developed to withstand the wide temperature fluctuations inside a tire without cracking, delaminating, or losing their protective properties. Some epoxies can also be made thermally conductive to help manage heat generated by the electronics. Strong Adhesion to Diverse Substrates: TPMS units often involve various materials – plastics for housings, metals for contacts, and ceramic components for sensors. Epoxy's excellent adhesion ensures a secure bond to…

Comments Off on Epoxy Potting: Unlocking Durability for Wireless TPMS Applications

Epoxy & Silicone for High-Performance Automotive Sensors & Displays

In the rapidly evolving automotive industry, advanced technologies like parking sensors and image display modules are no longer luxury features but essential components for safety, convenience, and autonomous driving. The performance and longevity of these critical systems hinge on the reliability of their underlying materials. For manufacturers and industry professionals, understanding the vital role of advanced adhesives and encapsulants, specifically epoxy and silicone, is paramount. This blog explores their applications and how solutions from Incure can significantly enhance your projects. The Foundation of Reliability: Why Material Selection Matters Automotive environments are notoriously demanding. Components must withstand extreme temperatures, vibrations, moisture, chemicals (like oil, fuel, and brake fluid), and electromagnetic interference. For delicate electronics within parking sensors and image display modules, the choice of encapsulating and bonding materials directly impacts their operational lifespan and performance. Parking Sensors: These typically rely on ultrasonic, radar, or magnetic technologies to detect obstacles. The sensor units, often located in bumpers, are exposed to constant environmental stress. Their internal electronics, including transducers and circuit boards, require robust protection. Image Display Modules: From infotainment screens to digital dashboards and rearview cameras, these modules provide crucial visual information to drivers. They need materials that ensure optical clarity, prevent delamination, protect sensitive circuitry, and offer excellent thermal management. This is where specialized epoxy and silicone formulations become indispensable. Epoxy: The Unyielding Protector Epoxy resins are renowned for their exceptional mechanical strength, chemical resistance, and strong adhesion to various substrates. In automotive applications, particularly for parking sensors, epoxy offers several critical advantages: Robust Encapsulation: Epoxy provides a hard, rigid shell that effectively protects sensitive electronic components from physical impact, vibrations, and harsh chemicals. This is crucial for sensors mounted on vehicle exteriors. Dielectric Properties: Their excellent electrical insulation properties prevent short circuits and ensure signal integrity, a non-negotiable for precise sensor operation. Thermal Stability: Certain epoxy formulations are engineered to withstand wide temperature fluctuations, maintaining their integrity even in engine compartments or extreme climates. Adhesion and Sealing: Epoxy's strong bonding capabilities are ideal for securely attaching sensor components and sealing housings against moisture and contaminants, ensuring watertightness. For manufacturers, the ability of epoxy to provide a durable, long-lasting barrier means fewer failures, reduced warranty claims, and enhanced reputation. Silicone: The Flexible and Resilient Solution Silicone-based materials, in contrast to epoxy, are known for their flexibility, excellent temperature resistance across a broader range, and superior dielectric properties, making them highly valuable for both sensors and especially image display modules: Vibration Damping: The inherent flexibility of silicone allows it to absorb shocks and vibrations, protecting delicate electronic connections in both sensors and display modules, which are constantly subjected to road forces. Thermal Management: Silicones excel at heat dissipation. Thermally conductive silicone compounds are critical for preventing overheating in LED backlights and processing units within display modules, which can generate significant heat. Optical Clarity and UV Stability: For image display modules, optically clear silicones are vital for laminating display layers, providing protection without compromising visual quality. Their UV stability also prevents yellowing or degradation from sunlight exposure. Environmental Sealing: Silicone's excellent moisture resistance and long-term…

Comments Off on Epoxy & Silicone for High-Performance Automotive Sensors & Displays

LED Car Lamp Potting: Enhance Durability and Performance with Incure Solutions

In the rapidly evolving automotive industry, LED lighting has transitioned from a premium feature to a ubiquitous standard. Modern car lamps, especially those incorporating advanced LED technology, demand exceptional protection against environmental stressors like moisture, vibration, extreme temperatures, and chemical exposure. This is where the critical process of potting comes into play, providing a robust encapsulation that ensures the longevity and reliability of these vital components. For manufacturers and industry professionals, understanding the nuances of LED car lamp potting is paramount. It’s not merely about filling a cavity; it's about selecting the right materials and applying precise techniques to create a resilient, high-performance product. This blog post delves into the challenges and solutions in LED automotive lamp potting, and how innovative partners like Incure are driving forward this crucial aspect of automotive lighting. The Imperative of Potting in Automotive LED Assemblies LED car lamps operate in some of the most demanding environments. From the scorching heat of a desert road to the freezing temperatures of an arctic winter, coupled with constant vibrations and potential exposure to road salt, oils, and other chemicals, the electronic components within these lamps face relentless assault. Without proper protection, these elements can lead to: Moisture Ingress: Water and humidity can cause short circuits, corrosion of sensitive electronic components, and ultimately, lamp failure. Vibration Damage: Constant road vibrations can stress solder joints and delicate wiring, leading to intermittent connections or complete breakage. Thermal Stress: LEDs generate heat, and effective heat dissipation is crucial for their performance and lifespan. Without proper thermal management through potting, localized hotspots can accelerate degradation. Chemical Exposure: Automotive fluids, cleaning agents, and environmental pollutants can degrade unprotected materials, compromising the integrity of the lamp. Potting compounds act as a protective shield, encapsulating the entire LED assembly, filling voids, and creating a barrier against these threats. This encapsulation significantly extends the operational life of the LED lamps, ensuring consistent performance and reducing warranty claims. Key Challenges in LED Car Lamp Potting Despite its clear benefits, achieving optimal LED potting presents several challenges for manufacturers: Material Selection: The potting compound must possess a unique combination of properties: Excellent Adhesion: Strong bonding to various substrates (LEDs, PCBs, housing materials) to prevent delamination. Thermal Conductivity: Efficiently dissipating heat generated by the LEDs away from critical components. Optical Clarity (for front-facing LEDs): Maintaining light transmission without yellowing or degradation over time. UV Stability: Resisting degradation from prolonged exposure to ultraviolet radiation, especially for exterior applications. Chemical Resistance: Withstanding exposure to automotive fluids, road salts, and cleaning agents. Dielectric Strength: Providing electrical insulation for sensitive components. Low Shrinkage: Minimizing stress on delicate components during curing. Voiding and Air Bubbles: Trapped air bubbles during the potting process can create weak points, compromise thermal dissipation, and reduce the overall protective capabilities. Proper vacuum degassing or precise dispensing techniques are crucial. Process Optimization: Achieving consistent and repeatable potting requires meticulous control over dispensing speed, temperature, mixing ratios (for two-part systems), and curing parameters. Scaling production without compromising quality is a significant hurdle. Repairability Concerns: Once potted, repairing individual components within an LED lamp can be challenging,…

Comments Off on LED Car Lamp Potting: Enhance Durability and Performance with Incure Solutions

Can You Reuse Casting Resin? A Manufacturer’s Perspective

For manufacturers and industry professionals, efficiency and sustainability are increasingly intertwined goals. In the world of resin casting, questions often arise about material longevity and waste reduction. A common query is: "Can you reuse casting resin?" The answer, in most practical and industrial scenarios, is no, not in its mixed, liquid form after the curing process has begun. However, there are crucial distinctions and best practices that can significantly minimize waste and optimize material usage. This blog post will clarify why mixed casting resin typically cannot be reused, discuss strategies for minimizing waste, and demonstrate how Incure's commitment to quality and precise formulations can help you optimize material consumption and improve operational efficiency. The Irreversible Nature of the Curing Process The primary reason mixed casting resin cannot be "reused" is due to the fundamental nature of its curing process. Most casting resins are thermosetting polymers, meaning they undergo an irreversible chemical reaction (polymerization or cross-linking) once the resin (Part A) and hardener (Part B) are combined. Once Mixed, the Clock Starts: As soon as Part A and Part B are mixed, the chemical reaction begins. This reaction proceeds through various stages: from liquid to gel, and eventually to a solid, cured state. This process is continuous and cannot be stopped or reversed once initiated. Irreversible Hardening: Unlike thermoplastics (which can be melted and reshaped multiple times), thermosets like cured casting resin cannot be re-liquefied, re-dissolved, or returned to their original two-part liquid state. Once cured, they are permanently set. Pot Life (Working Time) is Finite: Every mixed resin system has a finite "pot life" – the time during which it remains liquid and workable. Beyond this period, the resin will thicken, gel, and eventually harden in its container, rendering it unusable for casting. The take-away: Any mixed casting resin that is not used within its pot life will inevitably cure into a solid mass and become unusable for further liquid casting applications. Strategies for Minimizing Resin Waste in Manufacturing While you cannot "reuse" mixed resin that has begun to cure, manufacturers can implement several strategies to minimize waste and optimize material usage: Precise Measurement and Batching: Measure by Weight: Always measure resin and hardener by weight using a calibrated digital scale, not by volume. This is the most accurate method and prevents off-ratio mixes that lead to wasted material due to improper cure. Calculate Needs Accurately: Before mixing, precisely calculate the volume of resin required for your mold(s) or application. Account for any displacement by embedded objects. Mix Small Batches: If you have multiple smaller molds or a complex pour, mix smaller, manageable batches rather than one large one. This extends your working time for each batch and reduces the risk of resin curing in the pot before use. Industrial Relevance: For high-volume production, consider automated metering and mixing dispensing systems. These machines precisely measure and mix resin and hardener at the point of application, virtually eliminating pot life waste. Optimize Pot Life Management: Understand Your Resin's Pot Life: Each resin has a specific pot life (available on the TDS). Plan your work accordingly.…

Comments Off on Can You Reuse Casting Resin? A Manufacturer’s Perspective

How Long Should Resin Cure Before Removing from the Mould?

For manufacturers and industry professionals, the moment of demolding a freshly cast resin part is often filled with anticipation. Will it be perfectly formed and cured, or will it be tacky, deformed, or worse, damaged? The key to a successful release, preserving intricate details, and maintaining dimensional integrity lies in understanding how long resin should cure before removing it from the mold. Rushing this critical step is a common cause of costly defects and project setbacks. This blog post will delve into the science behind resin curing, clarify the difference between initial and full cure, and provide actionable advice to ensure your castings are ready for a flawless demolding. We'll also highlight how Incure's high-performance resins and expert guidance empower you to achieve optimal results in your production cycles. Beyond "Dry to the Touch": Understanding the Cure Stages Resin doesn't simply "dry." It undergoes a chemical reaction called curing, which proceeds through various stages. Knowing these stages is vital for demolding decisions: Pot Life (Working Time): This is the window of time after mixing the resin and hardener during which the resin remains liquid and workable. Beyond this, it starts to thicken and gel. Gel Time (Initial Gelling): The point at which the resin transitions from a liquid to a soft gel. It's no longer pourable but not yet solid. Tack-Free Time / Initial Cure (Demolding Time): This is the most crucial stage for demolding. At this point, the resin has hardened sufficiently to be removed from the mold without deforming or leaving fingerprints. It feels solid to the touch and isn't sticky. However, it's still relatively soft and susceptible to damage. Full Cure (Maximum Hardness & Strength): The resin has completed virtually all of its chemical reactions, achieving its ultimate mechanical properties (hardness, tensile strength, chemical resistance, heat resistance). This can take significantly longer than the initial cure. The Golden Rule for Demolding: Wait for Tack-Free / Initial Cure. Removing resin from the mold before it reaches its tack-free or initial cure stage is a recipe for disaster. The part will likely: Deform: If not rigid enough, it will sag, warp, or lose its intricate details. Be Tacky: Leave sticky residue on the mold and be unpleasant to handle. Suffer Surface Damage: Fingerprints, scratches, or tears can easily occur. Break or Crack: If internal stresses are still forming and the material is not robust enough, handling can cause immediate fracturing. Factors Influencing Demolding Time The precise duration until a resin reaches its demoldable (tack-free) state depends on several critical factors: Resin Formulation: Chemistry (Epoxy, Polyurethane, Polyester, UV-Cure): Different resin chemistries have inherently different cure speeds. UV-Cure Resins: Cure in seconds to minutes under appropriate UV light. Demolding can be almost immediate after sufficient exposure. Polyester Resins: Often reach demoldable state within 1-4 hours. Polyurethane Resins: Can vary from minutes to several hours for demoldability, depending on whether they are fast-setting or standard formulations. Epoxy Resins (General Purpose): Typically require 12-24 hours for initial cure/demoldability. Deep Pour Epoxies: Due to their low exotherm, these take much longer, often 24-72 hours for initial demoldability, and sometimes even longer for larger/thicker pieces. Manufacturer's Insight: Always consult the Technical Data Sheet…

Comments Off on How Long Should Resin Cure Before Removing from the Mould?

How Thick Can You Cast Resin for Industrial Applications?

For manufacturers and industry professionals, the ability to create robust, thick-section resin castings in a single pour is a significant advantage, streamlining production and expanding design possibilities. However, determining "how thick" you can pour casting resin is not a universal constant. It's a critical question that directly impacts the success of your project, influencing everything from cure quality and part integrity to clarity and overall efficiency. Pouring too thick for a given resin formulation can lead to catastrophic failures like excessive heat, cracking, yellowing, or an incomplete cure. Understanding the nuanced factors that govern maximum pour depth is essential for optimizing your processes. This blog post will delve into the science behind resin pour depths, provide actionable advice for making informed decisions, and illustrate how Incure's specialized resin formulations empower you to achieve your desired casting thicknesses with confidence. The Core Challenge: Exothermic Heat The primary limiting factor for casting resin pour depth is exothermic heat. When the resin and hardener (or catalyst) combine and cure, they generate heat as a byproduct of the chemical reaction. Thin Pours: In thin layers, this heat can dissipate easily into the surrounding air or mold, keeping the temperature within a safe range. Thick Pours: In thicker layers, the heat becomes trapped within the mass of the resin. This concentrated heat can cause the temperature to skyrocket, leading to: Rapid, Uncontrolled Curing (Runaway Exotherm): The reaction accelerates exponentially, generating even more heat. Boiling and Excessive Bubbling: The resin can literally boil, creating large, unsightly, and strength-compromising bubbles. Yellowing or Discoloration: High temperatures can permanently yellow clear resins. Cracking and Shrinkage: Rapid expansion and subsequent contraction as the resin cools create immense internal stresses, leading to cracks, delamination, or warping. Soft Spots or Incomplete Cure: Paradoxically, extreme overheating can sometimes "burn out" the hardener, leading to localized under-cured or brittle areas. Key Factors Determining Maximum Pour Depth The maximum thickness you can pour depends on a combination of critical factors: Resin Formulation (The Most Important Factor): Deep Pour Resins: These are specialized casting resins, usually epoxy-based, specifically engineered to generate very low exothermic heat and have an extended pot life. This allows the heat to dissipate slowly and safely, even in large volumes. They typically have a very low viscosity to facilitate bubble release in deep sections. General Purpose Casting Resins / Tabletop Epoxies: These are designed for thinner applications (e.g., coatings, thin castings, doming). They have higher exotherm profiles and faster cure times, making them unsuitable for thick single pours. UV Resins: Generally designed for very thin layers (millimeters, or even less) due to the need for UV light penetration. Thicker UV pours are less common unless specifically formulated or cured in layers. Manufacturer's Insight: Always check the resin's Technical Data Sheet (TDS). This document will clearly specify the maximum recommended single pour depth. Adhering to this is non-negotiable. Ambient Temperature: Warmer Environments: Increase the resin's internal temperature and accelerate the exothermic reaction. This reduces the safe pour depth. Cooler Environments: Slow down the reaction and aid heat dissipation, allowing for slightly thicker pours. Actionable Advice: Work within the resin's recommended temperature range (often…

Comments Off on How Thick Can You Cast Resin for Industrial Applications?

How to Mix Resin for Flawless Casting in Manufacturing

For manufacturers and industry professionals, the success of any resin casting project hinges on one fundamental step: precise and thorough mixing. This seemingly simple action is, in fact, a critical chemical process that directly impacts the final properties, clarity, strength, and longevity of your cast parts. Incorrect mixing is a leading cause of sticky cures, brittle results, or aesthetic defects, leading to wasted materials and lost production time. This blog post will provide a comprehensive guide on how to correctly mix resin for casting, offering practical insights and actionable advice to ensure consistent, high-quality results in your manufacturing operations. It will also highlight how Incure's commitment to quality materials and expert guidance empowers you to achieve perfection in every pour. Why Mixing is More Than Just Stirring Most industrial casting resins are two-part (2K) systems, consisting of a resin (Part A) and a hardener or curing agent (Part B). These two components are precisely formulated to react with each other in a specific stoichiometric ratio. The hardener acts as a catalyst, initiating the cross-linking polymerization process that transforms the liquid resin into a solid. The Consequences of Improper Mixing: Incomplete Cure: The most common issue. If the resin and hardener aren't fully integrated, unreacted areas will remain soft, tacky, or gummy, never achieving full hardness. Reduced Mechanical Properties: Even if it appears solid, poorly mixed resin will have compromised strength, lower chemical resistance, and poor dimensional stability. Aesthetic Defects: Streaks, cloudy patches, or uneven coloring can result from inconsistent mixing. Increased Waste: Scrapped parts due to mixing errors lead to material and labor loss. The Essential Steps for Perfect Resin Mixing Achieving a perfectly mixed resin requires adherence to a precise protocol. Here's a step-by-step guide for manufacturers: Step 1: Preparation is Paramount Read the Technical Data Sheet (TDS): Before you begin, thoroughly review the resin's TDS from your supplier (e.g., Incure). This document specifies: Exact Mixing Ratio: This is critical. It will be by weight (e.g., 100:30 by weight) or by volume (e.g., 1:1 by volume). Always prioritize mixing by weight for greater accuracy, especially in industrial settings. Pot Life (Working Time): The duration you have to mix, pour, and degas before the resin begins to thicken significantly. Recommended Mixing Time: How long to mix. Optimal Temperature: Ambient temperature significantly impacts viscosity and cure time. Gather Your Tools: Precision Digital Scale: Absolutely essential for mixing by weight. Clean Mixing Containers: Two containers are often recommended (double-mix method). Ensure they are clean, dry, and made of a material that resin won't stick to (e.g., polypropylene, silicone). Stirring Utensils: Flat-ended stir sticks (silicone or sturdy plastic are good) that allow you to scrape the sides and bottom effectively. Avoid wooden sticks as they can introduce moisture or fibers. Safety Gear: Nitrile gloves, eye protection, and a well-ventilated area with proper respiratory protection are non-negotiable. Step 2: Measure Precisely by Weight (Recommended for Professional Use) Zero Your Scale: Place your first mixing container on the scale and press the "tare" or "zero" button. Dispense Part A (Resin): Carefully pour or pump the exact required weight of Part A into the…

Comments Off on How to Mix Resin for Flawless Casting in Manufacturing

Epoxy vs. Resin: Which Is Best for Manufacturing and Industrial Projects

For manufacturers and industry professionals, the terms "epoxy" and "resin" are often used interchangeably, leading to a common question: "Is it better to use epoxy or resin?" The answer, however, is not a simple either/or. Instead, it requires a nuanced understanding of their relationship and the specific properties that make each ideal for distinct applications. This blog post aims to clarify the distinction, highlight the strengths of each, and provide actionable insights to help you make the optimal material selection for your projects, ensuring efficiency, durability, and cost-effectiveness. It will also demonstrate how Incure's diverse product portfolio and expertise can guide your choice for superior results. The Broader Category: What is "Resin"? Think of "resin" as the encompassing family name. In the context of industrial materials, "resin" refers to a broad class of synthetic or natural organic compounds that can be converted into solid polymers. This family includes many different chemistries, each with its own set of characteristics: Epoxy Resins: A specific type of resin. Polyurethane Resins: Known for their versatility in hardness and impact resistance. Polyester Resins: Often used with fiberglass, known for rigidity and faster cure. Acrylic Resins: Valued for clarity and UV stability. Vinyl Ester Resins: Offering good chemical resistance. So, when someone asks "Epoxy or resin?", it's akin to asking "Apple or fruit?" Epoxy is a specific type of resin, much like an apple is a specific type of fruit. The Specific Performer: What is "Epoxy Resin"? Epoxy resin is a thermosetting polymer created by mixing an epoxide polymer (Part A) with a polyamine hardener (Part B). This chemical reaction forms a highly cross-linked, incredibly durable, and strongly adhesive material. Epoxy resins are renowned in the manufacturing world for a set of highly desirable properties: Exceptional Adhesion: They bond strongly to a vast array of substrates, including metals, concrete, wood, and many plastics. High Mechanical Strength: Excellent tensile, compressive, and flexural strength, making them robust for structural applications. Superior Chemical Resistance: Resistant to a wide range of acids, alkalis, solvents, and fuels. Low Shrinkage: Undergo minimal shrinkage during curing, leading to high dimensional stability and reduced internal stress. Excellent Electrical Insulating Properties: Ideal for electronics and electrical encapsulation. Durability and Hardness: Provide hard, abrasion-resistant surfaces. Common Applications for Epoxy Resins in Industry: Adhesives: High-strength structural bonding in aerospace, automotive, and construction. Coatings: Durable floor coatings (e.g., in factories, warehouses), protective coatings for metals, and marine applications. Composites: As the matrix resin for fiberglass, carbon fiber, and aramid fiber composites. Potting and Encapsulation: Protecting sensitive electronic components from environmental factors. Tooling and Molds: Creating precise and durable molds and fixtures. When to Choose a Non-Epoxy "Resin" (e.g., Polyurethane, Polyester, UV-Curable) While epoxy is a star performer, other types of resins offer specialized advantages that make them the better choice for certain applications: Polyurethane Resins (PUR): Versatility in Hardness: Can be formulated to cure from very rigid to highly flexible elastomers (rubbers). This makes them ideal for parts requiring shock absorption, seals, or soft-touch surfaces. Excellent Abrasion Resistance: Often outperform epoxies in high-wear applications. Faster Cure Times: Some PUR systems cure much faster than typical epoxies. Applications: Gaskets, seals, flexible molds, impact-resistant components,…

Comments Off on Epoxy vs. Resin: Which Is Best for Manufacturing and Industrial Projects

Casting Resin Cracking: Common Causes and How to Prevent Them

For manufacturers and industry professionals, the sudden appearance of cracks in a seemingly perfect resin casting can be a frustrating and costly setback. What starts as a clear, pristine liquid, designed for precision and durability, can unexpectedly fail, compromising both aesthetics and structural integrity. Understanding why casting resin cracks is paramount to preventing these issues, optimizing your processes, and ensuring consistent, high-quality output. This blog post will delve into the primary culprits behind resin cracking, offering practical insights and actionable advice to help you troubleshoot existing problems and proactively avoid future defects. It will also highlight how Incure's advanced resin solutions and expert support can help you achieve flawless, crack-free castings. The Science of Stress: Why Resins Fail Casting resins crack primarily due to internal stresses that build up within the material during the curing process or after it has hardened. These stresses can exceed the material's tensile strength, leading to fractures. The key factors contributing to these stresses are: Excessive Exothermic Heat (Thermal Stress): The Culprit: The most common reason for cracking, especially in thicker pours. The chemical reaction between the resin and hardener (or the curing process in UV resins) generates heat, known as exotherm. If this heat builds up too rapidly or intensely, the resin expands. As it cools, it contracts quickly and unevenly, creating immense internal tension that can lead to cracks, often visible as spiderweb patterns or deep fissures. Contributing Factors: Pouring too thick for the resin's formulation, too high ambient temperature, using too much hardener, or a combination of these. Industrial Impact: This is particularly critical for large castings, encapsulation, and river tables where significant volume is poured at once. Rapid or Uneven Cooling (Thermal Shock): The Culprit: Even if exotherm is managed, rapidly cooling a cured or curing resin (e.g., placing a warm casting into a cold room, or using cold molds) can induce thermal shock. Different parts of the casting cool and contract at different rates, leading to stress concentration and cracking. Contributing Factors: Sudden temperature drops, using very cold molds, or drastic environmental changes post-cure. Industrial Impact: Can compromise the integrity of large-scale parts or those with varying thicknesses. Inaccurate Mixing Ratios: The Culprit: Deviations from the manufacturer's recommended resin-to-hardener ratio can lead to an improper cure. Too little hardener often results in a soft, tacky, or brittle cure, while too much hardener can significantly increase exotherm and lead to brittleness, making the resin more susceptible to cracking. Contributing Factors: Eyeballing measurements, inaccurate scales, or insufficient mixing. Industrial Impact: Directly affects the mechanical properties and long-term durability of the cast part. Under-Curing or Incomplete Curing: The Culprit: If the resin does not fully cure, it remains weaker, softer, or more brittle than intended. This under-cured state makes it highly susceptible to cracking under minimal stress, impact, or even slight thermal fluctuations. Contributing Factors: Too low ambient temperature, insufficient hardener, short cure time, or insufficient UV light exposure (for UV resins). Industrial Impact: Leads to product failure, reduced lifespan, and inability to withstand service conditions. Shrinkage During Curing: The Culprit: All resins exhibit some degree of shrinkage as they…

Comments Off on Casting Resin Cracking: Common Causes and How to Prevent Them