UV resin has revolutionized crafting, jewelry making, and even industrial applications, offering unparalleled speed and crystal-clear results. But to harness its magic, you need to know how to use a UV curing light for resin effectively. This isn’t just about pointing a light; it’s about understanding the process to achieve flawless, durable, and stunning creations every time.
Whether you’re a beginner venturing into resin art or a seasoned professional looking to optimize your workflow, this guide will walk you through the essential steps and highlight how advanced solutions from Incure can elevate your projects.
The Basics: What You Need Before You Start
Before you even turn on your UV light, ensure you have these essentials:
- UV Resin: Choose a high-quality UV resin suitable for your project type (e.g., hard type, soft type, colored).
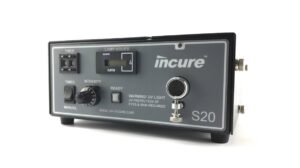
- UV Curing Light: Select a lamp appropriate for your project size and resin type (more on this below).
- Safety Gear: Crucial! Always wear UV-blocking safety glasses to protect your eyes from harmful UV rays. Work in a well-ventilated area or use a small fan to dissipate any fumes.
- Molds/Bezels/Surfaces: Whatever you’re pouring your resin onto.
- Mixing Tools: Silicone cups, stir sticks, or toothpicks if adding pigments or glitter.
- Wipes/Rubbing Alcohol: For cleaning up any spills or sticky residue.
Step-by-Step: How to Use Your UV Curing Light for Resin

Follow these steps for successful UV resin curing:
Step 1: Prepare Your Workspace and Materials
- Cleanliness is Key: Ensure your mold, bezel, or project surface is completely clean and dust-free. Any specks will be magnified by the clear resin.
- Set Up Safely: Put on your UV safety glasses. If working with large amounts of resin or in an enclosed space, ensure good ventilation.
- Measure and Mix (if applicable): If adding pigments, glitter, or other inclusions, mix them thoroughly into your UV resin before pouring. Avoid over-mixing, which can introduce air bubbles.
Step 2: Pour Your UV Resin
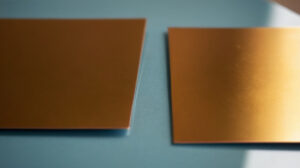
- Layer Thinly: This is arguably the most critical tip for UV resin. Pour your resin in thin layers (typically 1-3mm at a time). Thick layers trap heat, can lead to incomplete cures, and may result in yellowing or a sticky surface.
- Address Bubbles: Use a heat gun on a low setting, a lighter flame (quickly passed over the surface), or a toothpick to pop any surface bubbles. Be gentle and quick to avoid scorching the resin.
Step 3: Position Your UV Curing Light
- Optimal Placement: Place your UV curing light directly over your resin project. For small desktop lamps, ensure the entire surface of your resin is within the light’s effective curing area.
- Distance Matters: Generally, you want the light to be close enough to the resin for effective curing, but not so close that it causes excessive heat buildup, especially with less powerful lights. Follow your lamp’s instructions.

Step 4: Initiate the Curing Process
- Turn On the Light: Activate your UV curing light. Most lamps have timer settings (e.g., 60s, 120s, 180s, continuous).
- Start with Shorter Cures: For the first thin layer, a shorter cure time (e.g., 60 seconds) might be sufficient. You can always add more curing time if needed.
- Monitor the Cure: Watch the resin. It should begin to harden and lose its liquid appearance.
Step 5: Cure in Layers (If Needed)
- Repeat for Thicker Projects: If your project requires multiple layers, cure each thin layer until it’s hard to the touch before adding the next. This prevents under-curing and helps manage heat.
- Flip and Cure (Optional but Recommended): For 3D pieces or those with intricate undersides, it’s often beneficial to flip your piece over and cure the bottom side as well. This ensures a thorough, even cure throughout the entire piece, preventing stickiness or flexibility on the underside.
Step 6: Post-Cure and Finishing
- Check for Stickiness: After the final cure cycle, touch the surface (carefully!). It should be hard and non-tacky. If it’s still sticky, cure it for another cycle.
- Clean and Polish: Once fully cured, you can demold your piece. Any slight tackiness can often be removed by wiping with rubbing alcohol. For a high-gloss finish, you can polish or add a final clear coat.
Troubleshooting Common Issues
- Sticky Surface: Insufficient curing time, too thick a layer, or incorrect wavelength. Cure for longer, in thinner layers, or check your lamp’s specifications.
- Soft/Flexible: Similar to stickiness, often due to under-curing. Ensure full exposure to UV light.
- Yellowing: Can be caused by over-curing (excessive heat), using low-quality resin, or an unsuitable UV lamp.
- Bubbles: Stirring too vigorously, not allowing bubbles to rise, or overheating the resin.
Ready to perfect your resin projects and achieve results that shine? Explore Incure’s range of advanced UV curing solutions and experience the pinnacle of curing technology.