Optical Adhesives for High-Demand Applications

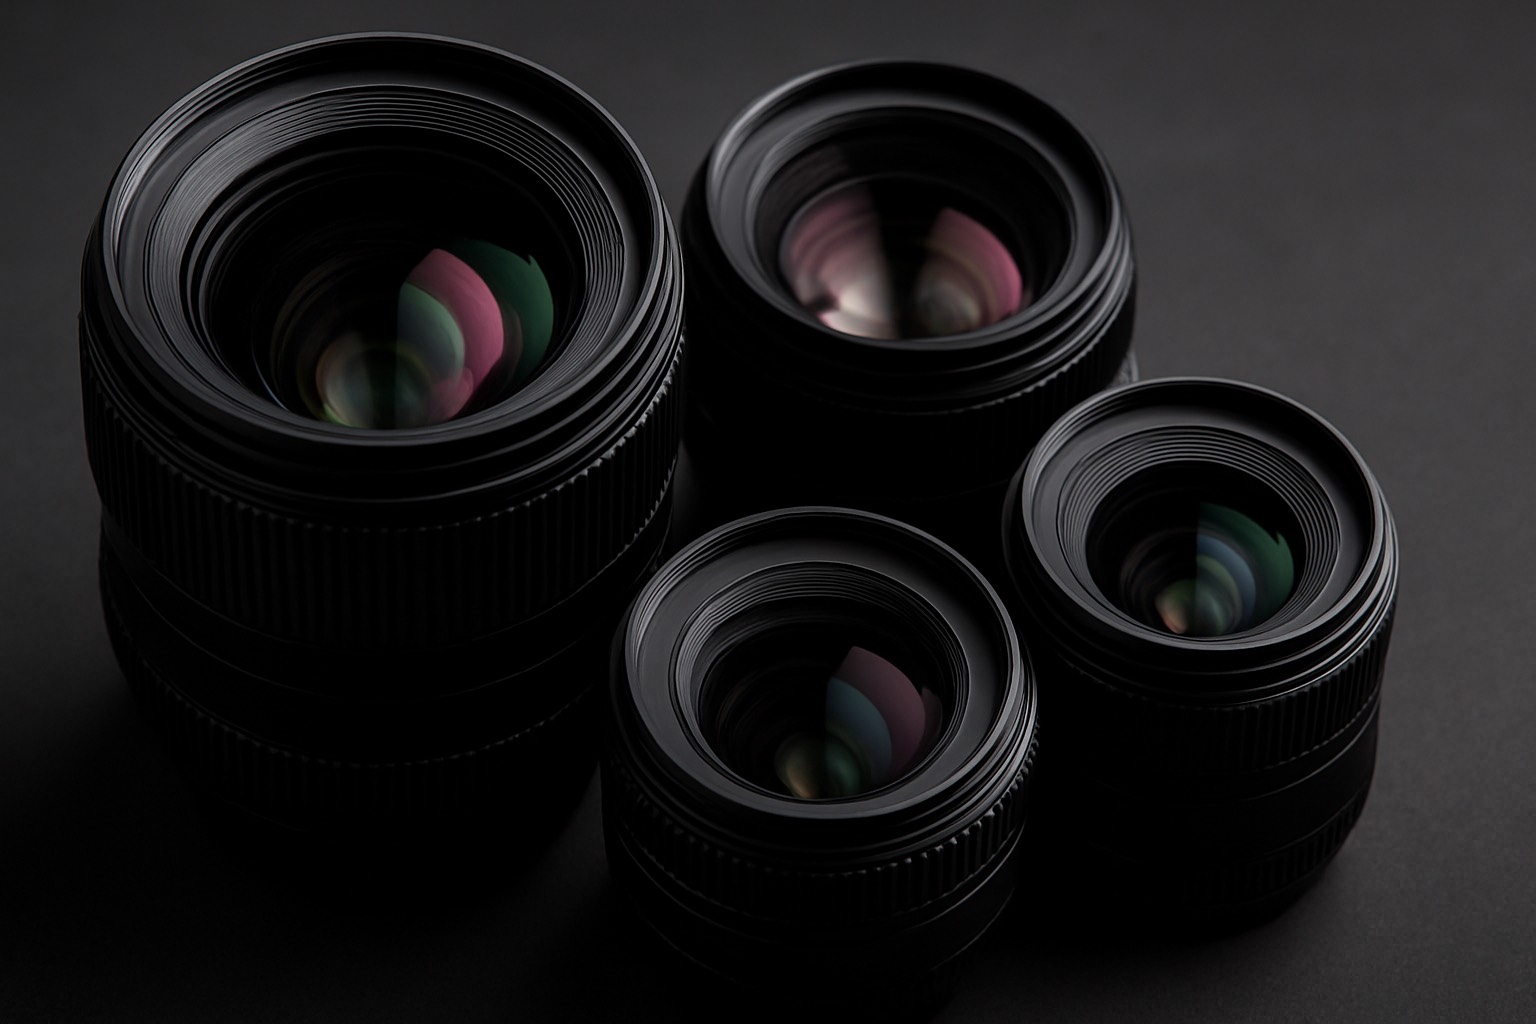
Some optical assemblies never leave a climate-controlled room. Others ride in a vehicle, sit on a tower, or cycle from freezing to hot every day. When the environment is severe, the adhesive holding the optics has to keep both its alignment and its clarity through conditions that would degrade a general-purpose bond. What "High-Demand" Means for an Optical Bond Demanding service stacks several stresses on the same joint: Thermal cycling between wide temperature extremes, which flexes the bond line every cycle as the substrates expand and contract by different amounts Sustained humidity or damp heat, which can shift refractive index, cloud the layer, or attack the adhesion at the interface Vibration and mechanical shock during transport and operation Long service life, often a decade or more, with no opportunity for rework An adhesive that passes a room-temperature pull test can still fail all of these. Properties That Carry a Bond Through Hard Service Incure formulates the Optik line of light-curable optical adhesives with grades aimed at exactly this problem. The properties that matter for durability are: Low coefficient of thermal expansion and a glass transition temperature above the maximum operating temperature, so the bond stays dimensionally stable and does not soften in heat Very low cure shrinkage, which limits the stress locked into the joint at assembly Low water absorption, keeping index and clarity stable through humidity exposure Toughness and elongation sufficient to absorb vibration and shock without cracking the bond or the glass 100 percent solids chemistry with no volatiles to outgas, form voids, or fog nearby surfaces Rapid, complete cure under UV, visible, or LED light for repeatable production Designing for Durability The single biggest driver of thermal-cycling life is the expansion mismatch between the optic and its mount. A stiff adhesive maximizes alignment stability but transfers that mismatch stress into brittle glass; a more compliant grade absorbs it. The trade-off is explained in how CTE mismatch causes adhesive bond failure, and it should be settled before a grade is chosen. Beyond material selection: Prepare surfaces for humidity resistance. Plasma treatment or a silane primer on glass substantially improves the durability of the interface in damp heat. Control the bond line. A uniform, moderate thickness set by spacers distributes stress better than a thin, variable one. Qualify with real profiles. Subject coupons to the actual temperature range, damp-heat soak, and vibration spectrum the product will see, not a generic screen. For help selecting an optical adhesive for a specific environmental profile, Email Us with your temperature, humidity, and vibration requirements. Outgassing and Enclosed Optical Systems In a sealed optical assembly, anything the adhesive releases as vapor can condense on a cold optic and form a haze that scatters light. Solvent-borne adhesives are the biggest concern here, which is one reason 100 percent solids chemistry is preferred for demanding optical work: there is no carrier solvent to flash off, and a fully cured network has little residual monomer to volatilize. For assemblies destined for vacuum or near-vacuum service, outgassing…
1 Comment

Optical Epoxies: Selecting a High-Bond-Strength UV Optical Adhesive

An optical epoxy is asked to be invisible and immovable at the same time. It must transmit light without color or haze, hold precise alignment for years, and carry real mechanical load through shock and temperature swings. Getting all of that from one material means understanding what the specifications actually control. What "Optical" Adds to an Adhesive Spec Beyond ordinary bond strength, an optical adhesive is judged on a second set of properties: Transmission and clarity: High light transmission across the working wavelengths, with low haze and no visible yellowing after cure or aging. Refractive index: A defined index, often near 1.5, so the adhesive layer does not introduce reflection or distortion at the interfaces. Shrinkage: Very low cure shrinkage, because any volume change moves the bonded elements and distorts the wavefront. Coefficient of thermal expansion: A low CTE and a glass transition temperature above the service range keep alignment stable and limit stress on brittle glass. Water absorption: Low uptake, since absorbed moisture shifts index and can cloud the layer. High-Bond-Strength Optical Adhesives Incure formulates the Optik line of light-curable optical adhesives, including grades built for demanding structural optical work. These grades combine strong adhesion to glass and to metal or ceramic mounts with the clarity and dimensional stability an optical path requires. Characteristics typical of the high-strength grades include: Adhesion well into the thousands of psi in lap shear on prepared glass and metal Rapid cure under UV, visible, or LED light, including with low-intensity lamps 100 percent solids formulation with no volatiles to outgas or void Very low shrinkage and low CTE for precise, stable alignment Retention of properties through humidity exposure and thermal cycling Choosing and Using the Right Grade Match viscosity to the joint. A thin, wicking grade fills capillary gaps between mated optics; a thicker grade bridges a defined gap or holds position on a vertical surface. Match mechanical character to the stress. A rigid, high-Tg grade maximizes alignment stability; a slightly more compliant grade better survives the stress of bonding materials with very different expansion rates. The reasons a stiff bond can crack a glass element over temperature are covered in how CTE mismatch causes adhesive bond failure. Prepare surfaces properly. Solvent-clean the glass, and use plasma treatment or a silane primer where long-term humidity resistance is required. Metal mounts should be degreased and lightly abraded or primed. Cure with line of sight to the bond, hold a controlled bond-line thickness with spacers, and manage oxygen inhibition at exposed surfaces with an inert blanket or added dose. For help selecting an optical adhesive grade for a specific assembly, Email Us with your optical, mechanical, and environmental requirements. Testing and Qualification An optical adhesive earns its place in a design by passing tests that mirror service, not a single room-temperature pull. A useful qualification set includes: Lap shear and tensile on the actual substrate pairs, in the surface condition production will use, before and after environmental exposure Thermal cycling across the full operating range,…

1 Comment

Glass Bonding Adhesive: Incure Optik 7210 for Clear, Strong Bonds

A glass bond has to do two things that pull against each other: disappear optically and hold mechanically. An adhesive that yellows, shrinks, or stresses the glass distorts a wavefront or cracks a mount long before it fails in shear. Incure Optik 7210 is a low-viscosity, light-curable adhesive for clear, durable glass bonds. What Makes Glass Bonding Difficult Glass is stiff, smooth, and chemically inert, which makes wetting and long-term adhesion harder than on most plastics. It is also brittle, so any stress the adhesive imposes as it cures or as temperature changes goes straight into the glass with no yielding to relieve it. And in an optical path, the cured adhesive is part of the system: its refractive index, clarity, and dimensional stability all affect performance. Where Optik 7210 Fits Optik 7210 cures on demand under UV, visible, or LED light and is built around the needs of optical and glassware assembly: Very low viscosity for precise placement and capillary wicking into thin joints Acid-free, 100 percent solids urethane acrylate chemistry that will not corrode adjacent metals and leaves no volatiles behind Very low linear shrinkage to preserve alignment and minimize wavefront distortion Low water absorption and good thermal and moisture resistance for stable service Toughness and vibration resistance so the bond survives handling and transport VOC-free operation, suitable for enclosed production areas Applying It Well Prepare the glass. Clean with a solvent that leaves no residue, and for demanding service, treat the surface with plasma or an appropriate silane primer to improve durability against humidity. Control the bond line. With a low-viscosity adhesive, the gap is set by the fixture, not the adhesive. Use hard stops or a small fraction of spacer beads to hold a consistent thickness, which keeps index and path length uniform. Cure with line of sight. Light-curable adhesives need the lamp to reach the bond. Design the fixture so glass, not opaque metal, sits between the lamp and the joint, and provide a secondary approach for any shadowed region. Watch for oxygen inhibition. The last few micrometers at an exposed adhesive surface can stay tacky if air contact continues during cure. A nitrogen blanket or a slightly higher dose clears it. Because glass and its mount often expand at very different rates, thermal cycling is where marginal glass bonds fail. Reviewing how expansion mismatch causes bond failure helps in choosing between a stiffer and a more compliant adhesive. The general trade-offs of transparent bonding with UV-curable adhesives apply directly here, and for glass-to-metal joints specifically, matching an adhesive grade to viscosity and tensile requirements is a useful reference. For help evaluating Optik 7210 against your optical and environmental requirements, Email Us with your substrate and joint details. Refractive Index and Optical Performance When an adhesive sits in a light path, its refractive index matters as much as its clarity. If the index is close to that of the glass, light crosses the bonded interface with almost no reflection. If it is significantly different, each…

2 Comments

PCB Potting vs. Conformal Coating: A Practical Comparison

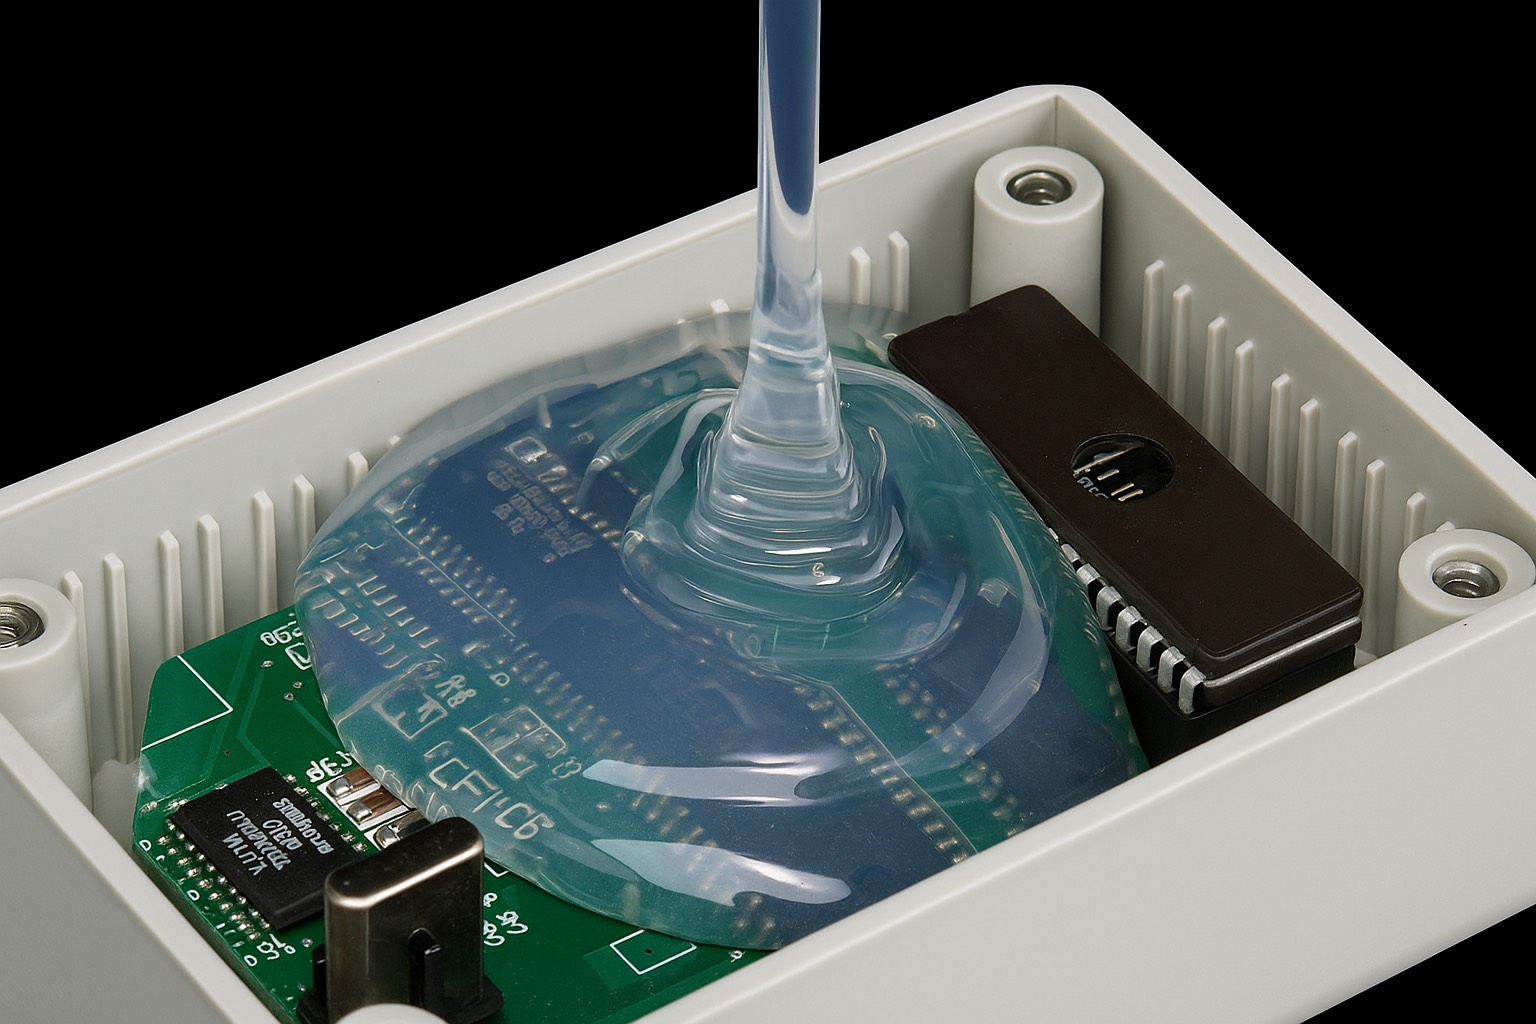
Both potting and conformal coating protect a circuit board from moisture, dust, and chemicals, but they solve the problem in very different ways and at very different costs. Picking the wrong one means either paying for protection you do not need or shipping a product that fails in the field. Conformal Coating Conformal coating applies a thin dielectric film, usually 25 to 75 micrometers, over the populated board. It follows component contours instead of burying them, so it adds almost no weight or thermal mass. Advantages: Components stay accessible for inspection, testing, and rework Minimal added weight and volume Lower material and processing cost than potting UV-curable versions cure in seconds, freeing floor space Limitations: Modest mechanical protection; little defense against impact or high vibration Can crack or delaminate over aggressive thermal cycling Limited help with heat dissipation Requires careful masking of connectors and test points PCB Potting Potting encases all or part of the assembly in a solid resin, typically epoxy, urethane, silicone, or a light-curable acrylate. The board is fully embedded. Advantages: Maximum protection against moisture, immersion, chemicals, and contaminants Strong resistance to shock and vibration Can improve heat transfer into the housing when a thermally conductive grade is used Obscures the circuit, adding a barrier against reverse engineering Limitations: Rework is difficult or impossible once cured Adds significant weight and volume Poured resin can impose stress on components as it cures and as temperature changes Deep pours require exotherm and void management How to Choose Several factors point toward one approach or the other: Mechanical environment: High vibration, impact, or handling abuse favors potting. A benign enclosure favors coating. Serviceability: If field repair or diagnostic access matters, coat rather than pot. Weight and space: Aerospace, portable, and handheld products usually cannot afford potting mass. Thermal management: Heat-generating assemblies may need a thermally conductive potting compound, or may need coating specifically so heat is not trapped. Exposure severity: Immersion, condensation, salt fog, and chemical splash push toward potting. Cost and throughput: Coating is generally faster and cheaper per unit. A hybrid approach often works well: pot the section that faces the harshest conditions, such as a power stage or a connector interface, and conformal coat the rest of the board. For help deciding between potting, coating, or a hybrid for a specific product, Email Us with your environmental and service requirements. Getting Either Process Right Whichever route you take, start with a clean, dry board. Ionic residue from flux feeds electrochemical migration under both a coating and a pot. Mask or plan around connectors and heat sinks. For light-curable materials, confirm that shadowed areas receive a secondary cure and that the lamp is sized to the board, whether that is a UV LED flood lamp or an inline conveyor system. Thermal cycling is the common failure driver for both methods, because the protective material and the board expand at different rates. Understanding how expansion mismatch causes cracking and delamination is central to selecting a resin or coating that…

Comments Off on PCB Potting vs. Conformal Coating: A Practical Comparison

The FIPG and CIPG Solution for Fast-Paced Production: Incure Uni-Seal 6322

On a high-volume line, a sealing material that needs minutes of oven time or a long moisture cure becomes the bottleneck. Incure Uni-Seal 6322 is a light-curable form-in-place and cure-in-place gasket material designed to seal electronic and automotive housings at the pace of automated production. The Case for Light-Cured Gaskets Traditional gasketing forces a choice between slow-curing liquid sealants and the inventory and fit problems of die-cut parts. A UV, visible, or LED light-curable FIPG or CIPG material removes that trade-off. The bead is dispensed exactly where it is needed, then cured on demand in seconds as the part passes a lamp, so throughput is set by line speed rather than by chemistry. What Uni-Seal 6322 Offers Acid-free formulation that will not corrode copper, solder, or fine-pitch conductors Low viscosity for precise dispensing into narrow channels and around tight corners Fast cure with low-energy LED lamps, suited to inline and conveyorized processes High resilience and memory retention, so the gasket recovers after compression cycles better than many cut elastomers Air-tight sealing against moisture, dust, and pressure differentials Moisture, temperature, and chemical resistance for under-hood and outdoor service Dual use as a temporary mask during conformal coating Building the Process Around It Bead and groove design. Give the dispensed bead a defined cross-section and a target compression of roughly 20 to 40 percent when the housing closes. Consistent geometry is what makes the seal repeatable unit to unit. Dispensing. A positive-displacement dispense head keeps bead volume constant as the material warms or the reservoir drains. Programmed paths hold the bead centered on the flange through corners and changes in direction. Curing. Size the lamp to the largest part so the entire bead reaches full cure in one pass. For long or complex flange paths, an inline conveyor curing system or a correctly matched UV LED flood lamp keeps cure time in step with takt. A cured gasket and a metal or plastic housing expand at different rates, so a seal that is fine at room temperature can loosen in the cold or over-compress when hot. Weighing how thermal expansion mismatch stresses a sealed joint guides the choice between a firmer and a more compliant grade. For help matching Uni-Seal 6322 to a dispense cell and cure station, Email Us with your cycle-time targets and housing geometry. Production Benefits Switching to a light-cured poured gasket typically shortens cycle time, cuts gasket inventory and scrap, reduces rework by forming the seal in one controlled step, and gives engineering the freedom to revise flange geometry without new tooling. The same material can seal a control-unit housing on one line and mask a board for coating on another. Resilience and Compression Set A gasket's job is to keep sealing after it has been compressed, warmed, cooled, and vibrated for years. The property that describes this is compression set: how much permanent deformation remains after the load is removed. A material with high compression set gradually loses its sealing force and the joint starts to leak,…

1 Comment

Choosing a UV-Curable Potting Compound for Electronics

Potting is supposed to be the last line of defense for an electronic assembly, but the wrong compound can crack a solder joint, cloud an optical window, or trap moisture against the copper it was meant to protect. Selecting a potting resin is a balance of optical clarity, cure speed, stress, and environmental resistance. What a Potting Compound Has to Do A potting compound fills the space around a circuit or component and hardens into a solid mass that seals out moisture and contamination, damps vibration, and holds parts in place. Because the resin touches every surface it surrounds, it has to do that without imposing damaging stress and without changing dimension as it cures or as temperature swings. Key Selection Criteria Viscosity: A low-viscosity resin flows into tight gaps and under fine-pitch components, reaching full coverage without trapped voids. Thicker grades stay put on vertical surfaces and in open cavities. Cure speed and method: UV and visible-light curable resins can set in as little as a minute under an appropriate lamp, which keeps work-in-process low. Shadowed regions under tall parts need a secondary heat or moisture cure path. Optical clarity: For assemblies with LEDs, sensors, or inspection requirements, a transparent resin keeps components visible and lets light pass without loss or color shift. Shrinkage and water absorption: Low linear shrinkage limits internal stress and warpage; low water absorption keeps dielectric properties stable in humid service. Chemical resistance: Grades resistant to mineral oils, fuels, and gases suit automotive and industrial environments. Substrate adhesion: Good bonding to metals, glass, and ceramics keeps the pot anchored to the housing. The Incure Uni-Seal line includes light-curable potting and sealing grades across this range, including higher-temperature options such as Uni-Seal 6213HT for chemically aggressive or hot service. Applying Potting Compound Correctly Start with clean substrates. Flux residue, oils, and mold release all interfere with wetting and adhesion, and ionic contamination left under the pot can drive electrochemical migration in humid conditions. Control the pour and the cure: Degas the resin, or vacuum-pot, to eliminate bubbles that concentrate stress and lower dielectric strength. For deep sections, cure in steps to keep the exotherm and shrinkage stress under control. Verify that light-curable resin in shadowed areas receives the secondary cure cycle. Check cured hardness against the datasheet before releasing parts, and pull periodic cross-sections to confirm void-free fill. Because the resin and the components expand at different rates, thermal cycling is the toughest test of a potting job. Reviewing how expansion mismatch causes cracking and delamination explains why a low-shrinkage, appropriately compliant resin outlasts a harder one in cycling service. When clarity is the priority, the same considerations that apply to transparent bonding adhesives apply to clear potting resins, and matching the resin to a correctly sized UV LED flood lamp ensures full through-cure. For help selecting a potting grade for your assembly and cure equipment, Email Us with your requirements. Clear Versus Filled Potting Resins An unfilled clear resin keeps components visible for inspection, lets…

1 Comment

The FIPG and CIPG Sealing Solution for Electronics and Automotive: Incure Uni-Seal 3393

A poured-in-place gasket only works if it seals on the first try and stays sealed through vibration, temperature swings, and chemical exposure. Cut gaskets shift, compress unevenly, and leave gaps at corners. Incure Uni-Seal 3393 is a light-curable form-in-place and cure-in-place gasket material built to seal complex geometries in electronics and automotive assemblies. Form-in-Place and Cure-in-Place Basics A form-in-place gasket (FIPG) is dispensed as a bead directly onto one mating surface, then cured before assembly so it behaves like a precision-molded seal. A cure-in-place gasket (CIPG) follows the same idea but is compressed between surfaces during cure. Both approaches eliminate gasket inventory, adapt instantly to design changes, and follow irregular flange paths that a die-cut part cannot. Why Uni-Seal 3393 Uni-Seal 3393 cures under UV, visible, or LED light and is engineered around the needs of sensitive electronics: Acid-free chemistry that will not corrode copper, solder, or fine-pitch leads Low viscosity for precise dispensing and penetration into narrow channels Tack-free cure leaving a clean, handleable surface with no residue transfer Air-tight sealing against moisture, dust, and pressure differentials Ease-of-peel rework, so a module can be opened for repair and resealed Moisture, temperature, and chemical resistance for under-hood and outdoor service Dual use as a temporary mask during downstream conformal coating Designing a Reliable Poured Gasket Bead geometry drives the seal. Specify a groove or a defined land width so the dispensed bead has a consistent cross-section and a target compression, generally 20 to 40 percent, when the housing closes. Too little compression leaks; too much extrudes material and can bottom out the joint. Dispense control is the other half. A positive-displacement dispense head holds bead volume constant as the material warms or the reservoir empties, and programmed paths keep the bead centered on the flange around tight corners. After dispensing, the assembly passes under a lamp sized to the part so the entire bead reaches full cure. Because a cured gasket and a metal or plastic housing expand at different rates, a seal that is fine at room temperature can open up in the cold or over-compress when hot. Considering how thermal expansion mismatch stresses a bonded or sealed joint guides the choice between a firmer or a more compliant gasket. Matching the material to a suitable UV LED flood lamp or an inline conveyor system keeps cure time in step with line speed. For help fitting Uni-Seal 3393 to a flange design and dispense process, Email Us with your housing drawings. Poured Gaskets Versus the Alternatives Die-cut elastomer gaskets carry a hidden cost: tooling for each new shape, inventory for each part number, scrap from the cut, and assembly labor to place them without pinching or misaligning. They also seal poorly at tight radii and sharp corners, exactly where enclosures tend to leak. A poured gasket forms to the flange path automatically and needs no part-specific tooling. Room-temperature-vulcanizing (RTV) silicone beads solve the fit problem but cure slowly from the surface inward, so a thick bead can stay soft…

1 Comment

Potting Compounds for Extreme Environments: Incure Uni-Seal 6213HT

Electronics that run hot, sit outdoors, or live inside a machine face a punishing mix of heat, moisture, vibration, and chemicals. A potting compound that passes a bench test can still crack or absorb water after a season in the field. Incure Uni-Seal 6213HT is built for assemblies that must keep working under those conditions. What Potting Does Potting fills the cavity around a circuit or component with a solid resin, creating a continuous barrier against the environment and a mechanical anchor against shock and vibration. Unlike a thin conformal coating, a potted section is fully encased, which raises protection but also puts the resin in intimate contact with every component. That makes two properties critical: low stress on the parts and stable behavior across temperature. Where Uni-Seal 6213HT Fits Uni-Seal 6213HT is a thick-viscosity adhesive that cures under UV, visible, or LED light, with heat as a secondary path for shadowed regions. The high viscosity keeps it in place on vertical walls and around tall components during application, and the multi-mode cure lets it set fully even where light cannot reach every surface. Key characteristics for demanding service: Deep single-pass potting to roughly 5 mm, forming a hard solid pot without repeated lifts Chemical resistance to mineral oils, fuels, gases, and common industrial solvents Low water absorption and low shrinkage, which limits dimensional change and internal stress over the service life Adhesion to metals, glass, and ceramics, so the pot stays bonded to the housing and substrate Smooth cured finish suitable for inspection and downstream handling Selecting and Applying a Potting Compound Match the resin to the environment. For high-temperature or chemically aggressive service, prioritize a low coefficient of thermal expansion, a glass transition temperature above the maximum operating temperature, and demonstrated resistance to the specific fluids present. For assemblies that dissipate significant heat, a thermally conductive grade moves that heat into the housing instead of trapping it. Process control determines whether those properties actually reach the finished part: Prepare surfaces. Clean off flux residue, oils, and mold release so the resin can wet and bond the substrate. Manage the exotherm. In deep or large-volume pots, cure in controlled steps so reaction heat does not spike and generate voids or shrinkage stress. Remove entrapped air. Vacuum degassing before or during pour prevents bubbles that concentrate stress and reduce dielectric performance. Cure completely. Confirm shadowed regions receive the secondary heat cycle, and verify hardness against the datasheet before releasing parts. Because the resin and the components expand at different rates, thermal cycling is where marginal potting jobs fail. Reviewing how expansion mismatch drives cracking and delamination helps explain why a compliant, low-shrinkage resin outlasts a harder, higher-stress one in cycling service. UV and visible-light potting resins also depend on adequate cure energy, so pairing the material with the right LED flood lamp for the curing area is part of the specification. For help evaluating Uni-Seal 6213HT against your temperature, chemical, and mechanical requirements, Email Us with your operating conditions. Thermal…

1 Comment

Everything You Need to Know About Conformal Coating

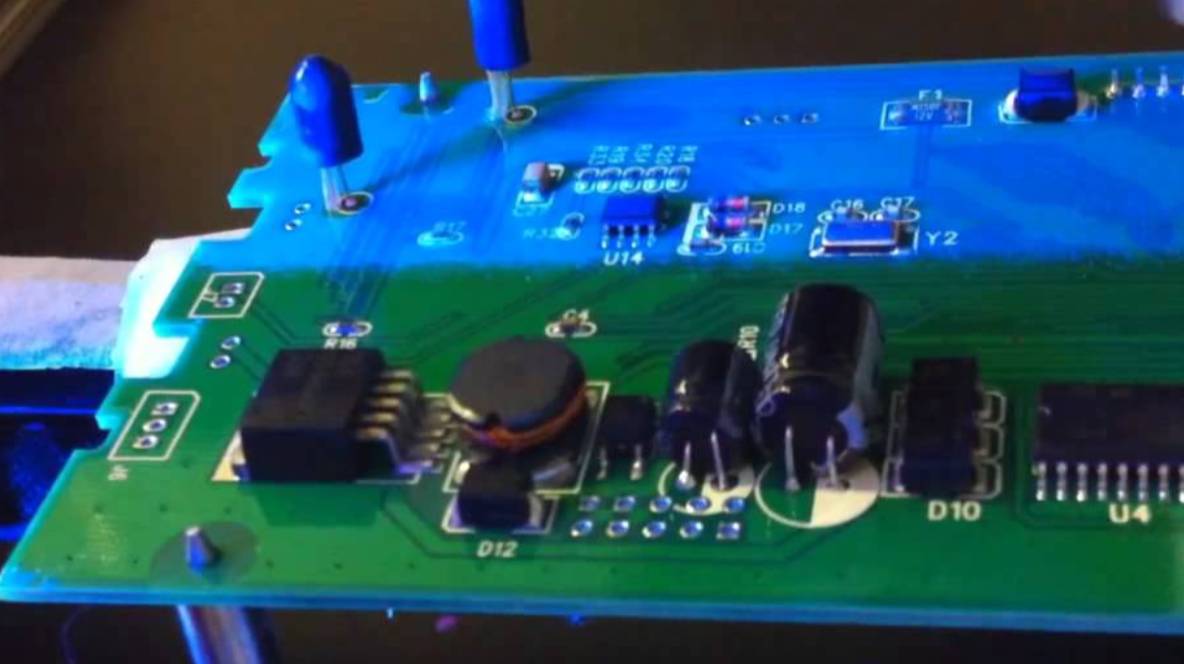
A circuit board that works perfectly on the bench can fail within months in the field if moisture, dust, or condensation reaches the copper. Conformal coating is the thin protective film that stands between a populated board and its environment, and choosing the right chemistry and process is what makes that protection last. What Conformal Coating Is Conformal coating is a dielectric layer, typically 25 to 75 micrometers thick, applied over a finished assembly. It follows the contours of components and solder joints rather than encasing them in a solid block, which keeps weight and thermal mass low and allows limited rework. The coating guards against several failure mechanisms at once: Moisture and humidity, which lower surface insulation resistance and enable current leakage Electrochemical migration and dendritic growth, where voltage bias plus moisture and ionic residue grows conductive filaments between traces Airborne contamination such as dust, salt, and process chemicals Light mechanical abrasion and handling damage Condensation during rapid temperature or altitude changes Coating Chemistries Each coating family trades off protection, reworkability, and process speed. Acrylic (AR): Easy to apply and remove, fast drying, good moisture resistance and fluorescence for inspection. Limited solvent and abrasion resistance. Urethane (UR): Strong chemical and abrasion resistance, good humidity performance. Harder to rework. Silicone (SR): Wide service temperature range and good performance under thermal cycling and high humidity. Softer surface, needs careful masking. Epoxy (ER): Very hard and chemically resistant, but effectively permanent and can stress components during thermal excursions. UV-curable: Cures in seconds under UV or LED light, freeing floor space and cutting work-in-process. Shadowed areas under tall components need a secondary moisture or heat cure mechanism. Parylene: Vapor-deposited, pinhole-free, extremely thin and uniform, but requires specialized batch equipment. Application Methods The process is chosen to match volume and board complexity. Brushing suits repair and low volume. Dipping coats both sides quickly but demands thorough masking. Spray, whether manual in a booth or automated, gives good control of thickness. Selective coating on a programmable system applies material only where it belongs, minimizing or eliminating masking on high-mix production lines. Whatever the method, surface preparation drives results. Boards must be clean and dry, with ionic residue from flux kept below the threshold that feeds electrochemical migration. Connectors, test points, and heat sinks are masked before coating and unmasked after cure. For help matching a coating chemistry and application method to your board mix, Email Us with your assembly and volume details. Curing and Inspection Cure mechanism depends on chemistry: solvent flash-off for many acrylics, moisture cure for many silicones and urethanes, and photopolymerization for UV systems. UV-curable coatings pair well with inline LED flood lamps and conveyor curing systems because they clear the bottleneck of long oven dwell. Coatings are formulated with a UV tracer so inspectors can confirm complete coverage and correct thickness under a blacklight. Automated optical inspection increasingly handles this step, flagging thin spots, bridging, and coating that has crept onto a masked connector. Thickness, Classes, and Qualification Coating performance is…

1 Comment

How Curing Conditions Shape Epoxy Adhesive Performance

Two assemblies bonded with the same epoxy can behave nothing alike if they cure under different conditions. Temperature, humidity, mix accuracy, and time each steer the final crosslink network, and small deviations show up later as weak bonds, tacky surfaces, or poor chemical resistance. Why Cure Conditions Matter Epoxy hardens through a chemical reaction between resin and hardener, not by drying. The reaction builds a three-dimensional polymer network whose density determines strength, stiffness, glass transition temperature (Tg), and resistance to solvents and moisture. A bond that reaches only 80 percent of full conversion can lose a large fraction of its rated shear strength and most of its chemical resistance, even though it feels solid to the touch. Cure conditions influence four properties in particular: Cure speed: Reaction rate roughly doubles for every 10 degrees C increase in temperature, so a part cured at 25 degrees C and one cured at 65 degrees C reach handling strength on very different timelines. Ultimate bond strength: Full lap-shear and peel values require complete conversion, which often needs elevated-temperature post-cure. Mechanical character: Under-cured epoxy stays soft and creeps under load; over-baked epoxy can turn brittle and lose toughness. Environmental durability: Only a fully developed network resists humidity, fuels, and cleaning chemicals. Common Curing Problems Manufacturers repeatedly run into the same failure modes: Temperature drift: Oven zones or bench conditions that swing more than a few degrees produce batch-to-batch variation in hardness and cure time. Amine blush: In cool, humid air, the hardener reacts with carbon dioxide and water to leave a greasy carbamate film on the surface. Anything bonded or coated over that film adheres poorly. Incomplete cure: Short dwell times, low fixture temperature, or a heavy heat-sinking substrate that pulls warmth away from the bond line all leave conversion unfinished. Voids and foaming: Trapped air, moisture on the substrate, or a strong exotherm in a thick pour can generate bubbles that concentrate stress. Mix error: Off-ratio resin and hardener, or incomplete blending, leaves unreacted material that never develops properties. Building a Reliable Cure Process Start with stoichiometry. Measure resin and hardener by weight where possible, mix thoroughly including the sides and bottom of the container, and respect the working life so you apply material while it still wets the surface. Control temperature at the bond line, not just in the room. For heat-cured systems, confirm the joint itself reaches the target with a thermocouple, and account for the time a large metal part needs to come up to temperature. A typical schedule might be a fixture cure to handling strength followed by a post-cure at 80 to 120 degrees C to raise Tg and finish conversion. Manage humidity for room-temperature systems. Keep relative humidity moderate, keep air moving gently, and if blush appears, wash it off with warm water before any downstream step. Allow enough time. Published fixture times assume ideal conditions; add margin when the shop is cold or the parts are massive. Deep sections should be poured in lifts to keep…

Comments Off on How Curing Conditions Shape Epoxy Adhesive Performance