UV glue, also known as UV adhesive, is widely used in various industries due to its quick curing time and strong bond. However, one common issue that users may encounter is the formation of bubbles in the glue after curing. These bubbles can compromise the adhesive’s performance, aesthetics, and overall effectiveness. Understanding why UV glue bubbles after curing and learning how to prevent and address this issue is crucial for achieving optimal results in your projects. In this blog, we’ll explore the reasons behind UV glue bubbles and provide practical solutions to prevent and resolve this problem.
Understanding UV Glue
What is UV Glue?
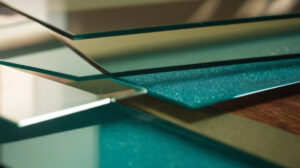
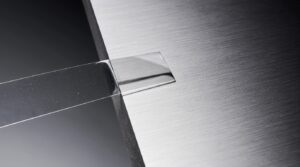
UV glue is a type of adhesive that cures and hardens when exposed to ultraviolet (UV) light. It is known for its rapid curing capabilities and strong, durable bonds, making it a popular choice for applications in electronics, optics, jewelry, and more.
Common Applications of UV Glue
- Electronics: Bonding components and assemblies.
- Jewelry Making: Setting stones and creating intricate designs.
- Optics: Assembling optical components with precision.
- Crafting: Various DIY projects requiring clear and strong bonding.
Why Does UV Glue Bubble After Curing?
1. Trapped Air or Moisture
Issue:
Trapped air or moisture within the adhesive can create bubbles during or after the curing process. This can occur if the adhesive is applied in a thick layer or if there are contaminants on the surfaces being bonded.
Solution:
- Apply Thin Layers: Apply UV glue in thin, even layers to minimize the risk of trapping air.
- Ensure Surface Cleanliness: Make sure the surfaces to be bonded are clean and dry before applying the adhesive.
- Vacuum De-Gassing: For critical applications, consider using a vacuum chamber to remove air bubbles before curing.
2. Inadequate UV Light Exposure
Issue:
Insufficient UV light exposure can result in incomplete curing, which may lead to bubbling as the adhesive continues to react or outgas after the initial cure.
Solution:
- Use Proper UV Light Equipment: Ensure that you are using UV light sources that are suitable for the adhesive and provide adequate intensity.
- Follow Curing Guidelines: Adhere to the manufacturer’s recommended curing times and conditions to ensure complete curing.
3. Chemical Reactions
Issue:
Certain chemical reactions within the adhesive can cause bubbles. This can be due to incompatibilities between the adhesive and the materials being bonded or the presence of reactive contaminants.
Solution:
- Check Compatibility: Ensure that the UV glue is compatible with the materials you are using. Refer to the technical data sheets for information on material compatibility.
- Avoid Contaminants: Avoid introducing contaminants such as dust or residues that might react with the adhesive.
4. Temperature Fluctuations
Issue:
Temperature changes during the curing process can affect the adhesive’s behavior, potentially leading to bubbling as the adhesive expands or contracts.
Solution:
- Maintain Stable Temperature: Keep the curing environment at a stable temperature as recommended by the adhesive manufacturer.
- Control Environmental Conditions: Minimize temperature fluctuations to ensure consistent curing and reduce the risk of bubbling.
How to Prevent UV Glue Bubbles
1. Proper Application Techniques
- Apply Evenly: Use proper techniques to apply the adhesive evenly, avoiding excessive thickness.
- Avoid Air Traps: Smooth out the adhesive to prevent air from being trapped between layers or in crevices.
2. Optimize Curing Conditions
- Use Adequate UV Light: Ensure that the UV light source is appropriate for the adhesive and provides sufficient exposure for full curing.
- Follow Instructions: Follow the adhesive manufacturer’s instructions for curing times and conditions to achieve the best results.
3. Pre-Treatment of Surfaces
- Clean Thoroughly: Clean the surfaces to be bonded to remove dust, grease, and moisture.
- Consider Surface Treatments: For challenging materials, apply a primer or surface treatment to improve adhesion and reduce the risk of bubbles.
4. Monitoring and Testing
- Conduct Tests: Perform small-scale tests to check for bubbling or other issues before full-scale application.
- Inspect Cured Bonds: Regularly inspect cured bonds to ensure they meet quality standards and address any issues promptly.
Conclusion
Bubbles in UV glue after curing can be a frustrating issue that affects the appearance and performance of your bonded components. By understanding the common causes of bubbling and implementing preventative measures, you can ensure that your UV adhesive applications are successful and free from defects. Proper application techniques, optimized curing conditions, and thorough surface preparation are key to achieving optimal results with UV glue.
If you have any questions or need further assistance with UV glue applications, feel free to contact us. Our experts are here to help you find solutions and achieve the best results for your projects.