Bridging the Gap: Effective Bonding of Thermoplastic Elastomers (TPEs) for Medical Devices

The world of medical devices demands both functionality and patient safety. Thermoplastic elastomers (TPEs) offer distinct advantages – flexibility, biocompatibility, and recyclability – making them a compelling choice for various medical device components. However, bonding TPEs to connectors can be a challenge. This blog dives into the world of bonding TPEs for medical devices, exploring the challenges, solutions, and best practices to achieve secure and reliable connections. Why Use TPEs in Medical Devices? TPEs offer numerous benefits for medical device applications: Enhanced Patient Comfort: TPEs provide a soft, pliable feel, improving patient comfort during device use. Biocompatibility: Many TPEs are biocompatible, minimizing the risk of adverse tissue reactions. Durability and Flexibility: TPEs offer good durability and flexibility, making them ideal for applications requiring both strength and adaptability. Recyclability: Certain TPEs are recyclable, contributing to a more sustainable manufacturing process. Challenges of Bonding TPEs Despite their advantages, bonding TPEs to connectors can be challenging due to: Low Surface Energy: TPEs often have a low surface energy, making it difficult for adhesives to adhere effectively. Chemical Resistance: Certain TPE formulations possess good chemical resistance, which can hinder adhesive bonding. Solutions for Effective TPE Bonding Fortunately, solutions exist to overcome these challenges and achieve secure bonding of TPEs to connectors in medical devices: Surface Pretreatment: Techniques like plasma treatment or chemical etching can increase the surface energy of TPEs, improving adhesion. Primer Application: Primers create a compatible layer between the TPE and the adhesive, enhancing bond strength. Adhesive Selection: Specific adhesives formulated for low surface energy materials like TPEs offer superior bond strength and performance. These may include: Cyanoacrylate Adhesives (Super Glues): Fast-curing and well-suited for small parts, but require careful application due to their rapid setting time. Epoxy Adhesives: Two-part epoxies provide excellent strength and chemical resistance, making them ideal for demanding applications. Polyurethane Adhesives: Offer good flexibility and durability, suitable for applications requiring some degree of joint movement. Best Practices for Bonding TPEs in Medical Devices Material Compatibility: Ensure compatibility between the chosen TPE, adhesive, and connector material. Surface Preparation: Thorough cleaning and appropriate surface pretreatment are crucial for optimal adhesion. Adhesive Selection: Select an adhesive specifically designed for bonding TPEs, considering factors like curing speed, strength requirements, and regulatory compliance for medical devices. Controlled Application: Follow the adhesive manufacturer's instructions for proper application and curing procedures. Testing and Validation: Conduct thorough testing to validate the bond strength and performance of the chosen bonding method for your specific application. Embrace Secure Connections with Effective TPE Bonding By understanding the challenges and implementing the solutions discussed above, manufacturers can achieve reliable and durable bonding of TPEs to connectors in medical devices. This ensures optimal functionality, patient comfort, and device performance in critical medical applications. So, explore the possibilities of TPEs in your medical device designs and leverage effective bonding techniques to bridge the gap between materials and create innovative solutions that improve patient care. Incure Cyro-Weld Series Core Products - TPE Adhesives Cyro-Weld™ 5480 Incure Cyro-Weld™ 5480: Ultra-Fast UV/Visible Light Curing, Medical-Grade,…
Comments Off on Bridging the Gap: Effective Bonding of Thermoplastic Elastomers (TPEs) for Medical Devices

Light-Curable FIP & CIP Gaskets: Innovative Sealing Solutions for Industrial Assembly

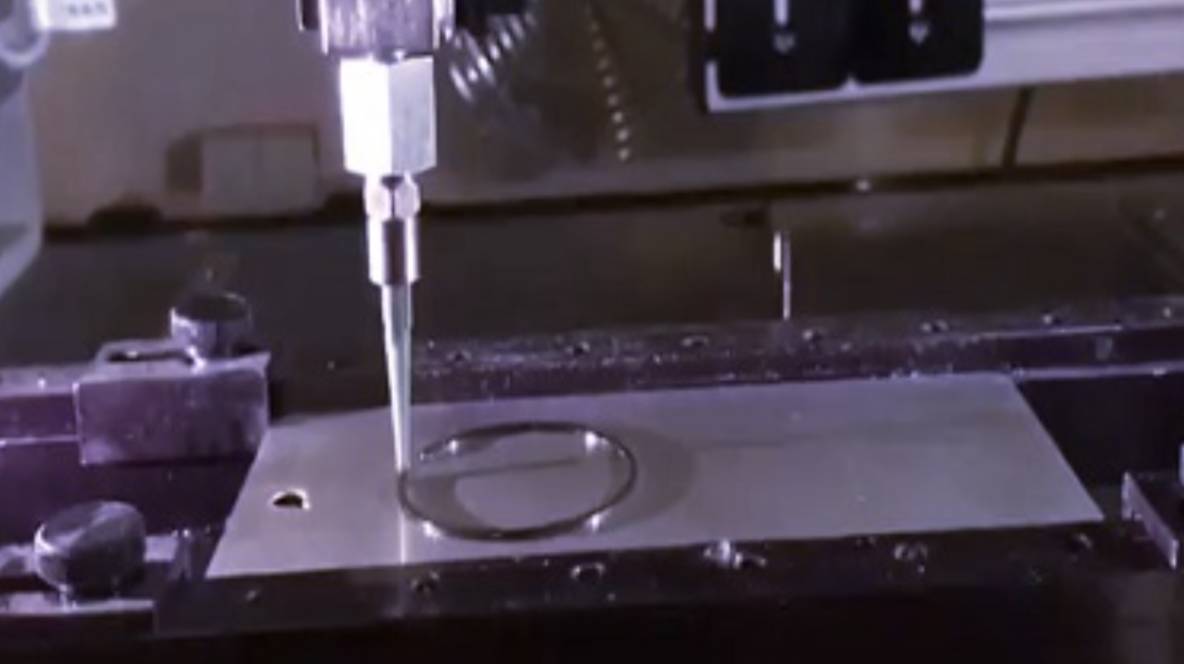
In the fast-paced world of industrial assembly, efficiency and reliability reign supreme. Traditional gasketing methods, like pre-cut gaskets and messy adhesives, can be time-consuming and prone to errors. Enter Light-Curable Form-In-Place (FIP) & Cure-In-Place (CIP) Gaskets – a revolutionary solution that streamlines assembly processes and ensures secure, leak-proof seals. This blog delves into the world of light-curable FIP/CIP gaskets, exploring their functionalities, advantages, and diverse applications in industrial settings. What are Light-Curable FIP/CIP Gaskets? Light-Curable FIP/CIP gaskets are innovative liquid sealants that eliminate the need for pre-cut gaskets. Here's what sets them apart: On-Demand Dispensing: The liquid form allows for precise application directly onto the assembly surfaces, eliminating the need for pre-cut gaskets and minimizing waste. Rapid Curing: Exposure to UV light triggers rapid polymerization, creating a strong, durable seal within seconds or minutes, significantly reducing assembly time. Conformable Sealing: The liquid form fills even the most intricate gaps and contours, ensuring a tight and reliable seal. Versatility: Available in various formulations to adhere to different materials and withstand diverse environmental conditions. Self-Leveling Properties: Certain FIP/CIP gaskets self-level, simplifying application and ensuring a uniform seal thickness. Benefits of Light-Curable FIP/CIP Gaskets Light-Curable FIP/CIP gaskets offer numerous advantages over traditional gasketing methods: Increased Efficiency: On-demand application and rapid curing significantly reduce assembly times and labor costs. Improved Precision: Precise dispensing eliminates misalignment issues common with pre-cut gaskets, leading to more reliable seals. Reduced Waste: Eliminates the need for pre-cut gaskets and minimizes the risk of incorrect size selection, reducing material waste. Enhanced Design Flexibility: FIP/CIP gaskets can be applied to complex geometries, offering greater design freedom compared to pre-cut options. Durable and Leak-Proof Seals: Cured FIP/CIP gaskets form strong, long-lasting seals that resist various environmental conditions, minimizing the risk of leaks. Applications for Light-Curable FIP/CIP Gaskets The versatility and efficiency of FIP/CIP gaskets make them ideal for a wide range of industrial assembly applications: Electronics Manufacturing: Seal enclosures, protect delicate components from dust and moisture. Automotive Assembly: Securely seal engine components, lights, and other parts. Appliance Manufacturing: Create leak-proof seals in appliances like refrigerators, dishwashers, and washing machines. Medical Device Assembly: Ensure secure and sterile seals in medical devices. Aerospace Applications: Withstand demanding environments and create reliable seals in aerospace components. Choosing the Right Light-Curable FIP/CIP Gasket Selecting the optimal FIP/CIP gasket requires considering several factors: Substrate Compatibility: Ensure the chosen gasket material adheres well to the specific surfaces being sealed. Environmental Conditions: Select a gasket formulation that can withstand the expected temperature, pressure, and chemical exposure. Desired Seal Characteristics: Consider factors like flexibility, compression set, and chemical resistance based on the application needs. Curing Speed: Choose a curing speed that aligns with your production line throughput for optimal efficiency. Application Method: Determine if manual or automated dispensing is required, and select a FIP/CIP gasket with the appropriate viscosity. Embrace Efficiency and Reliability with Light-Curable FIP/CIP Gaskets Light-Curable FIP/CIP gaskets offer a game-changing solution for industrial assembly. Their on-demand application, rapid curing, and conformable sealing capabilities streamline assembly processes and ensure…

Comments Off on Light-Curable FIP & CIP Gaskets: Innovative Sealing Solutions for Industrial Assembly

UV Light Curable Encapsulants for Microelectronic Assembly and IC Protection

Microelectronic devices fail at their weakest exposed point: a wire bond, a die edge, an unprotected junction. UV light curable encapsulants seal those points fast, forming a protective layer that solidifies in seconds under UV light instead of hours in an oven. What UV Curable Encapsulants Are A UV curable encapsulant is a liquid resin that flows around and over microelectronic components, then polymerizes into a solid protective mass when exposed to ultraviolet light. It sits between a thin conformal coating and a full potting compound: thicker and more protective than a coating, more localized and lower-stress than a potted block. Key characteristics for microelectronics use: Fast fixture. UV exposure gels the resin in seconds, so parts move down the line quickly. Flow before cure. The liquid fills gaps under and around fine features, wire loops, and die edges before it is locked in place. Low cure stress. Formulations are tuned for low shrinkage and, in flexible grades, a low modulus that protects delicate bonds. Optical clarity in clear grades. A transparent encapsulant allows visual inspection of the protected joint. Low outgassing. Minimal volatile content protects nearby optical and contact surfaces. Advantages Over Heat-Cured Encapsulants Higher throughput. Seconds of UV exposure replace a 30-to-90-minute oven cycle. No thermal excursion. Heat-sensitive components, pre-applied solder, and temperature-limited substrates are not stressed by a bake. On-demand cure. The resin stays workable until deliberately exposed, eliminating pot-life waste and premature set. Single component. No mix ratio to control and no mixed-material shelf life. Lower energy use. UV LED curing draws power only during exposure. Where UV Encapsulants Are Applied Chip-on-board (COB) assembly: a protective dome over a bare die and its wire bonds mounted directly on a substrate. Glob-top and dam-and-fill: a retaining bead of higher-viscosity resin, then a lower-viscosity fill over the die. Wire bond and ribbon protection: locking fine interconnects against vibration and handling damage. Sensor and MEMS protection: sealing a sensing element while leaving the active area clear where required. Connector and terminal sealing: environmental protection at the interface between a device and its harness. Component ruggedization: staking tall or heavy parts against shock on boards used in automotive, aerospace, and industrial equipment. Shadowed Areas and Dual Cure UV light travels in straight lines, so resin hidden under a component or inside a deep cavity never sees direct exposure. Encapsulants intended for these geometries include a secondary cure mechanism, typically moisture or heat activated, that finishes the shadowed resin over the following hours. When specifying an encapsulant for a complex assembly, confirm the shadow-cure behavior against the actual part geometry rather than assuming full UV access. Email Us with your device layout and throughput target for an encapsulant recommendation. Curing Equipment Flood lamps cure batches and populated panels with a uniform dose. Our guide to matching a UV LED flood lamp curing area to intensity covers sizing the head to the board. Conveyor systems cure encapsulated assemblies inline. See matching a conveyor lamp head to line speed and part width. Whatever…

Comments Off on UV Light Curable Encapsulants for Microelectronic Assembly and IC Protection

Plastic Glue: Plastic Bonding Adhesives for PVC and Industrial Assembly

Bonding plastic reliably is harder than bonding metal, because plastics vary widely in surface energy, solvent sensitivity, and thermal movement. Choosing the right plastic adhesive for PVC and industrial polymers is what separates a joint that lasts from one that peels in the field. Why Adhesives Beat Fasteners for Plastic Even stress distribution. A bonded joint spreads load across the whole overlap instead of concentrating it at a drilled hole, which is where molded plastics tend to crack. Sealed joints. The adhesive line doubles as a gasket against moisture, dust, and process fluids. Clean appearance. No rivet heads or screw bosses on a visible surface. Dissimilar-material bonding. The right adhesive joins plastic to metal, glass, or a different polymer where welding cannot. Fast assembly. Many industrial adhesives fixture in seconds, supporting high line rates. Matching the Adhesive to the Plastic Plastics fall into rough bonding categories: Easy to bond (higher surface energy): rigid PVC, polycarbonate, ABS, acrylic (PMMA), PETG. These accept solvent cements, acrylics, cyanoacrylates, and UV-curable adhesives after a simple solvent wipe. Moderate: nylon, PBT, and many blends. Bond strength improves with abrasion and, in some cases, a primer. Difficult (low surface energy): polyethylene, polypropylene, PTFE, acetal, and TPO. These need surface treatment such as flame, plasma, corona, or a chemical primer before any adhesive holds. Identify the polymer first. A grade that performs on polycarbonate may do nothing on polypropylene. Common Adhesive Types Solvent cements partially dissolve the mating surfaces, which fuse as the solvent flashes off. This is the standard method for PVC and CPVC pipe, fittings, and fabricated sheet. The bond is effectively a weld and is not reversible. UV and visible-light curable acrylates cure in seconds under a lamp, cure on demand for repositioning, and bond a wide range of rigid plastics with high clarity. They suit high-volume assembly where at least one surface can see the light or where a secondary cure mechanism reaches shadowed areas. Two-part epoxies give high strength and chemical resistance across many substrates but cure over minutes to hours and require accurate mixing. Cyanoacrylates set fast and handle small parts and detail work; they can be brittle under peel and impact unless a toughened grade is used. Polyurethanes stay flexible and tolerate joint movement and thermal cycling, useful for bonding dissimilar plastics. PVC-Specific Guidance PVC is solvent-sensitive, which is an advantage for solvent cementing and a hazard for other processes. When using a non-solvent adhesive, keep aggressive solvents off the visible surface to avoid crazing. For rigid PVC panels and enclosures assembled on a line, a UV-curable acrylate avoids the odor, ventilation, and cure-time constraints of solvent cement while still producing a strong, sealed joint. Incure's Uni-Weld plastic bonder range is built for this work. Low-viscosity, low-cost grades such as Uni-Weld 1072 suit high-volume plastic bonding with a tack-free cure; ultra-fast grades like Uni-Weld 1054 bond polycarbonate, PVC, and elastomers with resistance to thermal cycling; and acid-free grades such as Uni-Weld 1462 and 1483 are formulated for electronics assemblies where…

Comments Off on Plastic Glue: Plastic Bonding Adhesives for PVC and Industrial Assembly

UV Optical Adhesives: A Guide to Light-Curing Bonds

In precision optics, the adhesive is part of the optical path. A bond line that scatters light, shifts with temperature, or yellows in service degrades the whole assembly. UV optical adhesives address this by curing on command under ultraviolet light into a clear, dimensionally stable joint. What UV Optical Adhesives Are UV optical adhesives are single-component formulations that stay liquid until exposed to UV light, then polymerize within seconds to minutes. They are engineered for properties that matter in an optical assembly: High transmission and low haze across the visible and near-infrared range. A specified refractive index, so the bond line can be index-matched to the glass or polymer it joins. Low shrinkage on cure, which limits stress birefringence and keeps components in alignment. Low outgassing, so volatile species do not condense on nearby optical surfaces. A range of viscosities, from wicking grades for tight capillary gaps to gels for vertical or gap-filling joints. Advantages Over Thermal and Two-Part Bonding Cure on demand. The adhesive holds its position while components are actively aligned, then locks when the operator triggers the UV exposure. This decoupling of positioning from cure is the main reason optical assemblers use UV chemistry. Fast cycle times. Fixture time drops from hours to seconds, freeing alignment stations. No mixing. Single-component supply removes mix-ratio error and pot-life waste. Controlled cure depth. Exposure can be staged, tacking first for a position check and then fully curing. Room-temperature process. No bake step means no thermal excursion for temperature-sensitive coatings and cemented stacks. Where UV Optical Adhesives Are Used Lens and doublet bonding in cameras, sensors, and instruments. Prism and beamsplitter assembly for imaging and metrology. Fiber termination and splicing, potting fiber into ferrules and connectors. Optoelectronic packaging, fixing detectors, emitters, and gratings in position. Display and cover-glass lamination, bonding protective glass to panels and touch sensors. Sensor and encoder assembly, where a code disc or window must stay square to its mount. Selecting the Right Grade Refractive index. Match the cured adhesive's index to the substrates to minimize reflection and distortion at the interface. A mismatch of a few thousandths is visible in a demanding system. Viscosity and gap. Low-viscosity grades wick into sub-25-micron gaps by capillary action; higher-viscosity and gel grades stay put in wider or vertical joints. Choose viscosity from the actual bond-line geometry. Thermal expansion behavior. The adhesive expands and contracts more than glass. Over a wide temperature range, that difference loads the bond and can shift alignment or craze the joint. Our explanation of how CTE mismatch causes adhesive bond failure covers the mechanism and how a slightly compliant grade mitigates it. Cure wavelength. Confirm the adhesive's photoinitiator absorbs where your lamp emits. Some grades also cure with visible light, which helps when one substrate blocks UV. Environmental spec. Humidity, thermal cycling, and vibration resistance vary by grade. Match the datasheet limits to the service environment. Incure's Optik series covers this range, including ultra-low-viscosity sealants such as Optik 7210 for precise alignment and vibration damping, higher-strength…

Comments Off on UV Optical Adhesives: A Guide to Light-Curing Bonds

UV Flood Lamps: A Guide to Large-Area UV Curing

When a UV-curable adhesive, coating, or ink has to set across a whole part rather than a single joint, a spot lamp is the wrong tool. A UV flood lamp delivers an even field of UV energy over a broad area, curing large surfaces in one exposure and keeping cycle times short on production lines. What a UV Flood Lamp Does A flood lamp projects UV output over a defined rectangular or square window, typically from a few square inches up to more than a square foot per head. Instead of the tight, high-intensity cone of a spot lamp, the flood pattern trades peak intensity for coverage and uniformity. That makes it suited to potting, conformal coating, laminating, gasket forming, and bonding of assemblies where the cured area is large. Two lamp technologies are common: UV LED flood lamps emit a narrow band, usually centered at 365, 385, 395, or 405 nm. They switch on instantly, run cooler, hold stable output over a long life, and contain no mercury. Arc (microwave or electrode) flood lamps produce a broadband spectrum from roughly 200 to 450 nm. The wide spectrum cures a broader range of photoinitiators and reaches deeper into pigmented or thick films, at the cost of warm-up time, higher heat load, and periodic bulb replacement. Advantages of Flood Curing Uniform dose across the part. A well-designed emission window cures edge-to-edge with minimal hot and cold spots, reducing localized under-cure. Fast cycle times. High-intensity exposure fixes many UV chemistries in seconds, so throughput rises against solvent or heat-cure alternatives. Process control. Dose is set by intensity and time, both measurable and repeatable, which supports documented cure validation. Lower energy use with LED. LED heads draw power only during exposure and convert more of it to usable UV, cutting operating cost and cooling demand. Cooler parts with LED. Reduced infrared output protects heat-sensitive substrates and thin films. Matching a Lamp to the Job Wavelength. The lamp's output has to overlap the adhesive or coating's photoinitiator absorption. A 365 nm LED suits many depth-cure adhesives; 395 and 405 nm suit surface cure and clear coatings. Broadband arc output covers formulations that need shorter wavelengths. Confirm the requirement with the material data before choosing a head. Intensity and dose. Thicker films and pigmented or filled formulations need higher intensity or longer dwell to reach full through-cure. Under-dose leaves a tacky surface or a soft underside; over-dose wastes energy and can embrittle some coatings. Coverage area. The emission window should cover the largest part in one exposure, or the line should index the part in steps that overlap. Our guide to matching a UV LED flood lamp curing area to intensity and chamber covers that trade-off, and matching an arc flood lamp model to curing area and intensity does the same for broadband systems. Working distance. Intensity falls with distance from the emitter. Fix the part-to-lamp gap and keep it constant, because a small change in standoff moves the delivered dose. Email Us with your…

Comments Off on UV Flood Lamps: A Guide to Large-Area UV Curing

UV LED Spot Lamps: Delivering Precise and Powerful Curing

A bead of UV adhesive the size of a grain of rice doesn't need a lamp that floods an entire workbench — it needs a tightly focused beam that cures exactly where it's aimed and nowhere else, in well under a second. What a UV LED Spot Lamp Does A UV LED spot lamp concentrates ultraviolet output from an array of LEDs into a narrow, high-intensity beam, typically delivered through a lightguide to the exact point where curing is needed. That focus is the entire value proposition: instead of irradiating a broad area and hoping the chemistry cures uniformly, a spot lamp lets an operator or automated system target a single bond line, dot, or fiber splice with minimal spill onto adjacent components. Compared to mercury arc spot lamps, LED versions add instant on/off switching, which removes the warm-up delay that used to force operators to leave older lamps running continuously between cycles. Why Precision Curing Matters on the Assembly Line Rapid, targeted curing changes the economics of an assembly step. High-intensity LED output can bring a UV-curable adhesive to handling strength in seconds rather than the minutes required by heat-cure or ambient-cure chemistries, which shortens fixture time and increases throughput on high-volume lines. The focused beam also limits UV exposure to the intended bond area, reducing the risk of over-cure discoloration or heat buildup in nearby heat-sensitive materials — a common failure mode when a flood-style lamp is used for a job that only needed a spot. Choosing Wavelength, Power, and Beam Configuration Selecting the right spot lamp starts with matching wavelength to the photoinitiator in your adhesive — 365 nm and 395–405 nm are the most common bands in industrial UV curing, and a mismatch here is the single most frequent cause of a "cured" bond that fails a peel test days later. From there, power output determines cure speed for a given bond line thickness, and lightguide configuration determines how many stations a single lamp head can serve simultaneously. If your process involves fiber-optic cable termination, small electronics assembly, or precision repair work and you're not certain which combination fits, Email Us and we'll help you match beam geometry to your bond line. Applications Where Spot Curing Outperforms Flood Curing Electronics assembly: bonding delicate, heat-sensitive components without irradiating the surrounding board. Fiber-optic termination: curing adhesives at connector interfaces where only the ferrule bond line needs exposure. Precision repair work: targeted re-bonding of small components without disturbing adjacent finishes. Inspection applications: specific UV wavelengths are also used in non-destructive testing (fluorescent penetrant inspection) and in surface-marking detection work, where a tightly controlled beam avoids washing out the surrounding field of view. Multi-Station Configurations Change the Math A single spot lamp head that drives several independent lightguides changes how you should think about capacity planning on a line. Output isn't infinitely divisible across stations — splitting one lamp's total power across four lightguides means each station receives a fraction of the peak irradiance a single-guide setup would deliver, so…

Comments Off on UV LED Spot Lamps: Delivering Precise and Powerful Curing

UV LED Flood Lamps: Powerful Curing and Area Illumination

A UV-curable coating that tests fully cured six inches from the lamp can still lift a fingernail's width further out — uneven flood coverage is one of the most common, and most avoidable, causes of soft-cure defects on production lines. What a UV LED Flood Lamp Does A UV LED flood lamp uses arrays of ultraviolet light-emitting diodes to project a broad, even field of UV energy across a work surface, rather than concentrating output into a single spot. That distinction matters: flood systems are built for coverage and consistency over an area, while spot lamps are built for intensity at a point. Flood output is typically specified in irradiance (mW/cm²) measured across the full working width, not just at a center peak, because a lamp that is strong in the middle and weak at the edges will under-cure the margins of a part even when the center reads perfectly on a radiometer. Why Manufacturers Are Moving Off Mercury Vapor Flood Systems Mercury arc flood lamps still have a place in broad-spectrum applications, but LED flood systems solve three problems that recur constantly on a shop floor. First, instant on/off eliminates the warm-up and cool-down cycle that wastes energy and slows changeovers. Second, narrower, tunable wavelength bands (commonly centered around 365 nm or 395 nm) let engineers match the lamp to the photoinitiator package in a specific resin, adhesive, or ink rather than curing with a broad spectrum that includes wavelengths the chemistry doesn't use. Third, LED emitters typically run tens of thousands of hours before measurable output drops below a usable threshold, which turns lamp replacement from a recurring line-stoppage event into an infrequent maintenance item. Matching Flood Lamp Output to Your Application Selecting a flood lamp isn't just about total wattage. Cure speed depends on the interaction between irradiance, wavelength, and the specific formulation's cure profile — a resin optimized for 395 nm will cure slowly, or not at all, under a lamp centered at 405 nm even if the power output is identical. Engineers should also account for line speed on conveyorized applications: a lamp rated for adequate cure at a static two-second dwell may be underpowered once that same part is moving past the array at production speed. If you're unsure how your formulation's chemistry lines up against a candidate lamp's spectral output, Email Us and our technical team can walk through the specification with you before you commit to hardware. Where UV LED Flood Curing Fits Best Flood lamps earn their keep in applications where the cure area is wide relative to the feature size being bonded or coated: Manufacturing assembly: curing surface finishes on electronics housings and bonding flat components across a broad footprint. Printing and graphics: setting UV-curable inks on signage, packaging, and printed electronics substrates. Industrial floor and panel coatings: rapidly solidifying UV-cured protective layers across large panels or flooring runs. Conveyor integration: in-line curing stations where parts pass continuously beneath a fixed flood array. Diagnosing Inconsistent Cure Across a Flood Field…

Comments Off on UV LED Flood Lamps: Powerful Curing and Area Illumination

See Clearly, Work Safely: A Guide to UV Eye Protection in Manufacturing

Manufacturing facilities often utilize various light sources, some of which can emit harmful ultraviolet (UV) radiation. While crucial for certain processes, unprotected exposure to UV light can pose a significant risk to workers' eyes. This blog dives into the importance of UV eye protection in manufacturing and explores effective strategies to safeguard worker vision. The Dangers of UV Exposure in Manufacturing Manufacturing environments can involve exposure to several sources of UV radiation, including: Welding Equipment: Arc welding generates intense UV light that can cause photokeratitis and long-term damage to the eyes. UV Curing Systems: These systems used for rapid curing of adhesives and coatings emit UV light that can be harmful if not properly shielded. Germicidal Lamps: While essential for sterilization, germicidal lamps emit UV-C rays that can damage the cornea and conjunctiva. Plasma Cutting: This cutting process produces UV radiation along with visible bright light, posing a risk to unprotected eyes. The Consequences of Unprotected UV Exposure Unprotected exposure to UV radiation in manufacturing settings can lead to several eye problems, including: Photokeratitis: This painful condition, similar to sunburn on the eye's surface, can cause temporary vision loss and discomfort. Welders Flash: This temporary condition, caused by intense UV exposure during welding, results in gritty eyes, light sensitivity, and blurred vision. Cataracts: Long-term UV exposure is a significant risk factor for cataracts, a clouding of the lens that can impair vision. Pterygium Growth: Chronic UV exposure can lead to a non-cancerous growth of tissue on the white of the eye. Safeguarding Eyesight in Manufacturing: Implementing UV Eye Protection Several measures can be taken to ensure worker safety from UV radiation in manufacturing facilities: Engineering Controls: Implementing physical barriers like curtains, shields, and fume hoods around UV light sources minimizes worker exposure. Administrative Controls: Establish clear safety protocols, including designated safe viewing areas and restricted access to high-risk areas. Personal Protective Equipment (PPE): Providing appropriate UV-protective eyewear is essential. Look for: UV Blocking: Choose safety glasses or goggles that block 99% or 100% of UVA and UVB rays. Lens Material: Polycarbonate or Trivex lenses offer superior impact resistance and UV protection. Welding Specific Shades: For welding applications, ensure the welding helmet shade is appropriate for the specific welding process. Fit and Comfort: Comfortable, well-fitting safety glasses encourage consistent use. Promoting a Culture of Eye Safety Creating a strong safety culture is crucial for protecting worker vision. Here are some additional tips: Regular Safety Training: Educate workers about the risks of UV exposure and proper use of PPE. Provide Replacement Eyewear: Offer replacements for damaged or scratched safety glasses to ensure continued protection. Regular Eye Exams: Encourage workers to schedule regular eye exams with their eye doctor to monitor their eye health. Investing in a Safe and Productive Future By prioritizing UV eye protection in manufacturing, you can create a safer and healthier work environment for your employees. Reduced eye injuries, improved worker comfort, and a commitment to long-term wellbeing all contribute to a productive and successful manufacturing operation. So, don't…

Comments Off on See Clearly, Work Safely: A Guide to UV Eye Protection in Manufacturing

Crystal Clear Fixes: Mastering Glass Repair with UV Adhesives

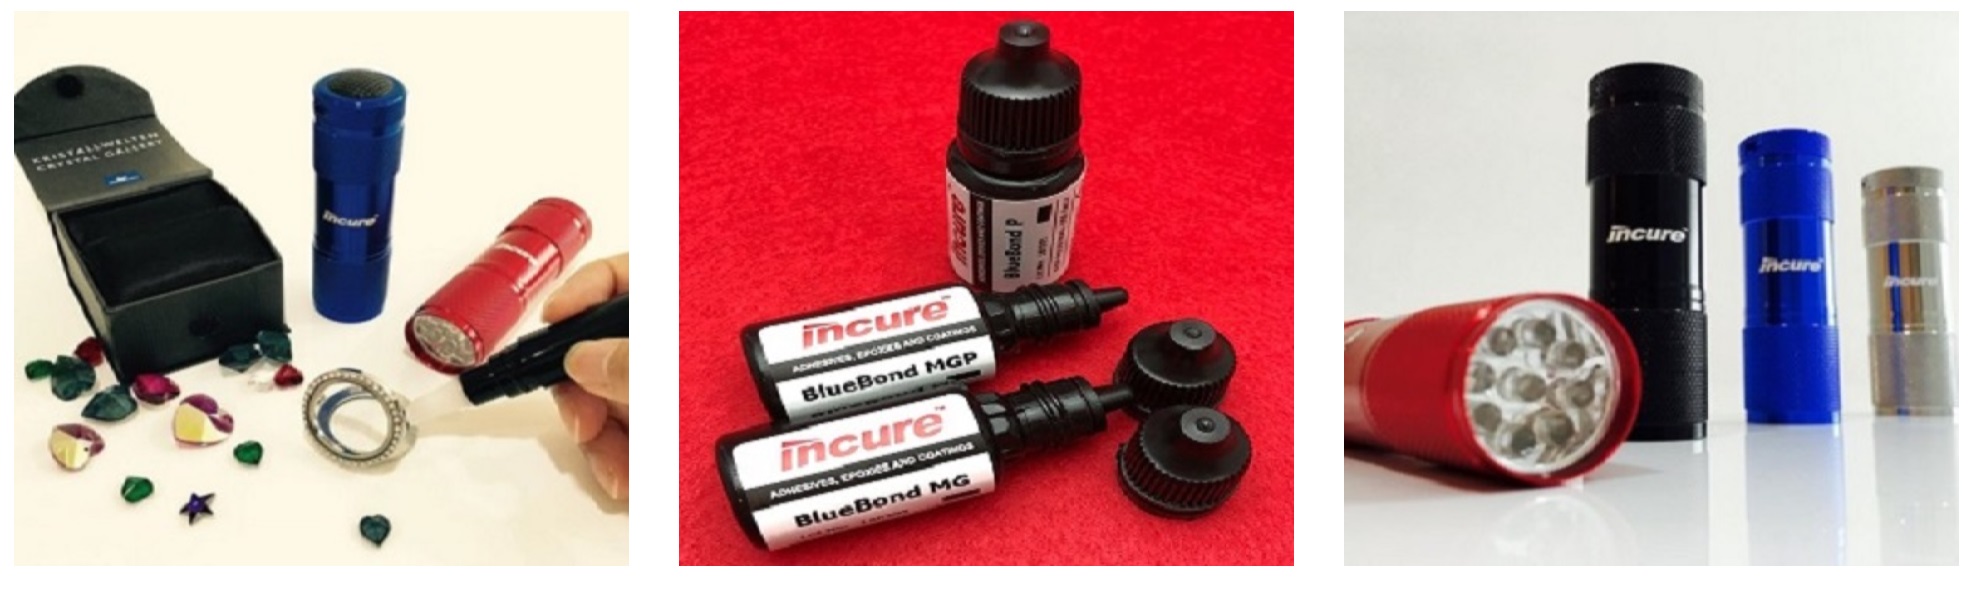
Broken glass can be a real headache. Replacing a shattered window or a favorite ornament can be expensive and time-consuming. But fear not! There's a solution that offers a quick, effective, and surprisingly strong fix: UV adhesives. This blog delves into the world of UV adhesives for glass repair, empowering you to tackle those glass mishaps with confidence. What are UV Adhesives? UV adhesives are a special type of glue that cures rapidly when exposed to ultraviolet (UV) light. They come in various viscosities (thicknesses) and formulations, making them suitable for bonding a wide range of materials, including glass. Why Choose UV Adhesives for Glass Repair? UV adhesives offer numerous advantages for glass repairs: Unmatched Speed: Unlike traditional glues that require hours to cure, UV adhesives solidify in seconds upon exposure to UV light. This minimizes downtime and allows you to complete repairs quickly. Crystal Clear Bond: When cured properly, UV adhesives form a clear, virtually invisible bond that maintains the visual integrity of the glass object. Strong and Durable Bonds: These adhesives create surprisingly strong bonds that can withstand significant stress in many glass repair applications. Easy to Use: Most UV adhesives come in user-friendly applicators like syringes or pens, requiring minimal preparation for use. Precise Application: The targeted nature of UV curing allows for precise control over the bonding area, minimizing the risk of messy overflow. Before You Begin: Preparing for Glass Repair with UV Adhesives For a successful repair, proper preparation is key: Gather Your Supplies: You'll need UV adhesive, a UV light source (often a small handheld lamp), cleaning supplies (alcohol wipes, microfiber cloth), and safety equipment (gloves, safety glasses). Clean the Glass Thoroughly: Remove any dirt, debris, or oil from the bonding surfaces using cleaning wipes. Ensure the area is completely dry before applying the adhesive. Plan Your Bond: Carefully position the broken glass pieces together to ensure a proper fit. Consider using tape to hold the pieces temporarily in place. Repairing Glass with UV Adhesives: A Step-by-Step Guide Apply the Adhesive: Following the manufacturer's instructions, apply a small bead of UV adhesive to one of the clean, dry bonding surfaces. Reassemble the Glass: Carefully position the broken pieces together, aligning them precisely. UV Light Curing: Expose the bonded area to the UV light source according to the recommended curing time (typically a few seconds to a minute). Hold the light steady to ensure even curing. Wipe Away Excess: While the adhesive is still slightly uncured, use a cotton swab dipped in alcohol to remove any excess adhesive that might have squeezed out. Full Cure: Allow the adhesive to fully cure for the recommended time as specified by the manufacturer (usually a few minutes). Tips for Flawless Glass Repairs with UV Adhesives Work in a well-ventilated area. Wear gloves and safety glasses for protection. Practice on scrap glass pieces before tackling your actual repair. Use masking tape to hold small fragments in place during the bonding process. For larger repairs, consider using a UV curing…

Comments Off on Crystal Clear Fixes: Mastering Glass Repair with UV Adhesives